Jennings restoration

Thanks for that Panky. I have one of those flue terminations, but it's the ventilation for cooling the elements that I'm on about. There was a bit of perforated hardboard under the fridge, and some mesh in the worktop. Both looked sh!te and nowhere near complying with the installation instructions I have downloaded which require the fridge to be sealed off from the interior. These vents are the big rectangular ones that i've got in the side of the VW, and I've seen in every other decent fridge installation. I think some fridges use a fan and smaller vents, but don't have any information on that kind of install.

I want to have all the info before I take a jigsaw to the side panels!!!!! Decision time is fast approaching.

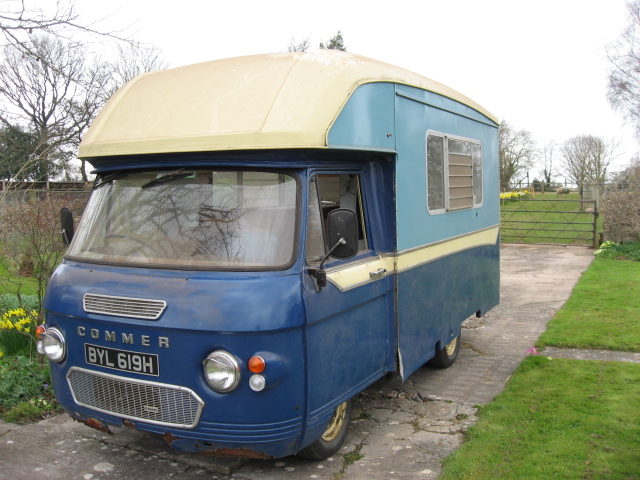
Commer PB Jennings
 
"Using the old panels as patterns, but they aren't a very good fit, so there's a lot of adjustments to make. Still a lot easier than making new patterns. The original panels were replaced on 15th February 1997 by FR. I wonder who that was".
That was a previous owner by the name of Fred Rickett, lives near Spalding. I found this Jennings for him many years ago, it was sitting unloved in a garden near Pershore, Worcs. Several pictures of it (then) featured in my book, 'Classic Camper Vans- the inside story'.

I started with nothing.....and I still have most of it!
 
Looking a little sad on page 99:)

41fa30c8-22ce-43e8-bd12-188475a80292.jpg
 
quote:
Originally posted by carcamper


That was a previous owner by the name of Fred Rickett, lives near Spalding. I found this Jennings for him many years ago, it was sitting unloved in a garden near Pershore, Worcs. Several pictures of it (then) featured in my book, 'Classic Camper Vans- the inside story'.


Well! I didn't expect that info to come back that quickly. Thank you car camper.

Commer PB Jennings
 
Right.........so I've bought my copy of "Classic Camper Vans - The Inside Story", and you're right of course, there is Beryl on P99! Fame at last. Plenty of useful info in there too.

One of our neighbours was clearing out her polytunnel. Did I want a 10 foot long workbench? Erm....Yes please!

A quick clean up, and straight into the barn.

2015314152012_2015_0314Commer0001.JPG


Back to the van. The new Oak panels have been stained and Danish Oiled, and the remaining old panels have had the surface stripped back a bit to match all the shades as good as possible. Medium Oak was too pale, and needed more brown, so I ended up with a coat of 50/50 Medium Oak/Antique Pine.

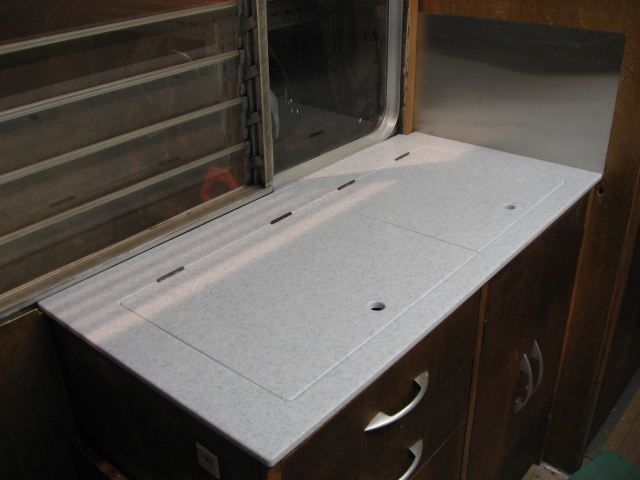
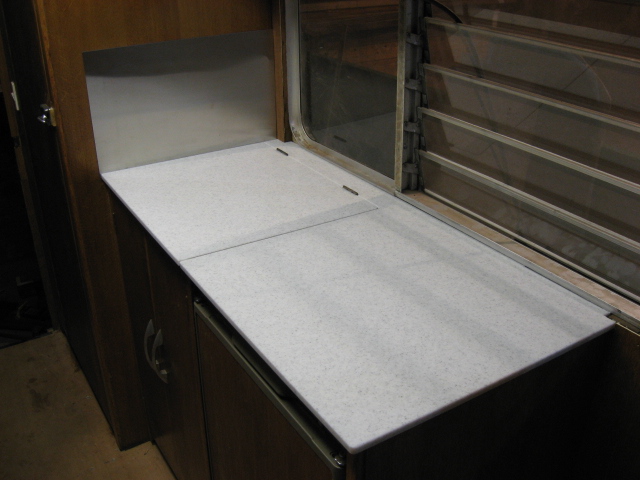
The old worktops were well past it. Those edgings stuck on with contact adhesive were doomed to failure. I looked at Corian, but they and most of the solid surface worktop manufacturers insist on using their nominated fabricators. Very expensive.

Then I found Samsung Staron, and got a couple of blanks off eBay. Evidently it's made of recycled mobile phone casings.

Here's the results. First the sink side.

2015314153537_2015_0314Commer0002.JPG


And the cooker side.

2015314153656_2015_0314Commer0003.JPG


I know it's not original, but I couldn't face fabricating all those panels with edging strips. Looks good though!

The bad news is that it's about 5kg heavier than the old worktops, so I need to save some weight elsewhere to compensate.

I could:-
  • a) Leave some stuff behind
  • b) Install a smaller water tank c) Ease off the pies for a few weeks before travelling

The even worse news is that although I was using dust collection while cutting the worktops, I got a severe skin reaction around the eyes. (I've had this before but with cellulose paints) and had to ease off for a day or two. There is quite a strong smell when machining, and I think his must liberate some sort of solvent. Oh well, we live and learn, but that really caught me by surprise. Just an excuse to watch the rugger really!

The fridge is now looking better, with a matching front panel, close fit in the recess and a neat fit under the worktop. I still haven't had the bottle to chop vents into the side of the van.

201531416659_2015_0314Commer0004.JPG


CD of the Perkins 4108 manual arrived in the post today, so I'll be ready to give the engine a check over soon.


Commer PB Jennings
 
Looks really nice but all that extra weight[:0] Better half fill the fridge with beer and stock up when you arrive;)

Have you seen this

http://www.ebay.co.uk/itm/111614448234?_trksid=p2055119.m1438.l2649&ssPageName=STRK%3AMEBIDX%3AIT

41fa30c8-22ce-43e8-bd12-188475a80292.jpg
 
I know it seems a bit anal weighing everything, but you do have to keep some kind of mental account of the gains and losses. It would be too easy to add a bit here and a bit there, and before you know it you have an extra 100kg. But by way of compensation, I have lost a load of steelwork associated with the steadies at the back end. And rust is heavier than clean steel of course, (unless it has previously dropped off on the road), and I've got rid of a box full of that!

I managed to lose 70kg plus a load of wind resistance off the roof of the VW, and it transformed the straight line stability and fuel economy.

I'm not convinced that a huge leisure battery is needed either. We rarely go wild camping for more than a couple of nights without a road run. We like "facilities" too much.


Commer PB Jennings
 
Got this little gem off Fleabay..........

201531823436_2015_0318Commer0003.JPG


It's a TR6 gearknob. Even has the correct gear pattern engraved on it. The fitting is different, but by grinding a shallow groove in each side of the thread on top of the gearstick, and using a half nut inside, it fitted well and won't rotate. I reckon that's the right place for an overdrive switch, right there when you want to change gear. The cable will be taped to the gearstick, and enters through a hole drilled in the back of the knob.

I don't claim any credit for this. I originally saw it somewhere else on this forum. I had this setup (Switch on the gearknob) on my Volvo 240, and liked it.

Commer PB Jennings
 
Don't tape the wire to the gear lever, get a length of black electrical "heat shrink". This will look better and protect the wire. Fitted the same to my 2500pi estate years ago when I converted it manual. The wires need to be quite light as there is very little room under the knob. Be careful soldering the wires to the switch terminals, I recall they are very short and too much heat can/will effect the operation of the switch.
 
Thanks for those comments.

Suinnyboy: You're right, and I even bought some heat shrink for the job, but I realised the trouble is, once the flex has been heatshrunk to the gearstick, I won't be able to get the knob off without cutting off the sleeving every time. At least until it's all well sorted, I'll be taping the wire to the gearstick. The terminals on the switch aren't solder terminals. The correct connectors are little brass tubes with a slit down one side, which slide over the little brass stubs on the side of the switch. (I know this because that was original equipment on my old 240, and I had to repair it every time the gear knob got pulled off) I made these connectors by using the brass crimp ends off some spade connectors, squeezing them to the right sized tube, and crimping and soldering to the wires. When done right, these connectors slide right into the spaces on the end of the switch. A right fiddly little job, and a photo won't do it justice.

Panky: I've bought some black flex for the job. Looks OK.

Commer PB Jennings
 
On a different subject, I've been tackling the drivers step. Slowly, slowly, and I'm gradually getting there (Pictures to follow soon). But there's one thing I haven't been able to suss out. Where does the "cill closer" go I've bought a pair of them off Martin, but can't for the life of me see exactly where they should go. Does anyone have a photo of them fitted in the right place?

One problem I have is that the van is up on blocks, and I can't open the drivers door enough to get at the hinge side to work easily. Doh!

Commer PB Jennings
 
Well, Martin kindly sent me a photo of a cill closer in situ, and to be honest, I'm none the wiser. I've offered one up, and it doesn't seem to fit in or promise any improvement in strength or any other advantage for that matter. Looks like I've got myself a couple of paper weights.

I may offer a small prize for the best suggestion of what to do with a pair of redundant cill closers.;)


Commer PB Jennings
 
The rugger is on the telly, Wales have just wacked Italy (never thought I'd be cheering for Italy!), so now it's Ireland v Scotland.

Time to write up the drivers step area..........

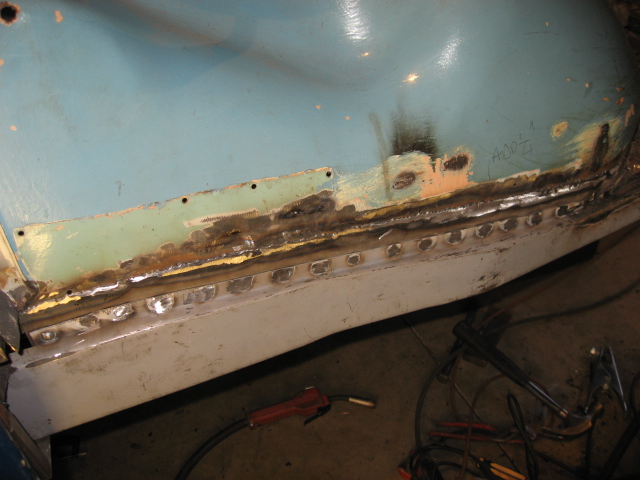
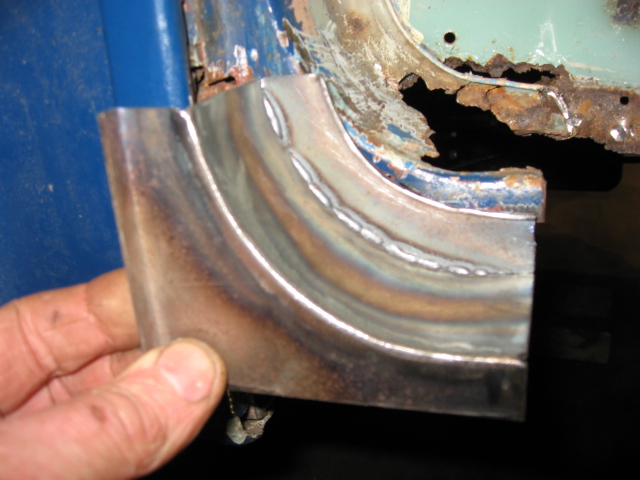
First, all the rubbish was chopped out. There is a smallish piece of outer cill to replace, and because of the coachbuilt sides, this has to be done from the inside, and that means doing it first. Easiest approach was to cut the cill above the flute line to make for an easier weld.

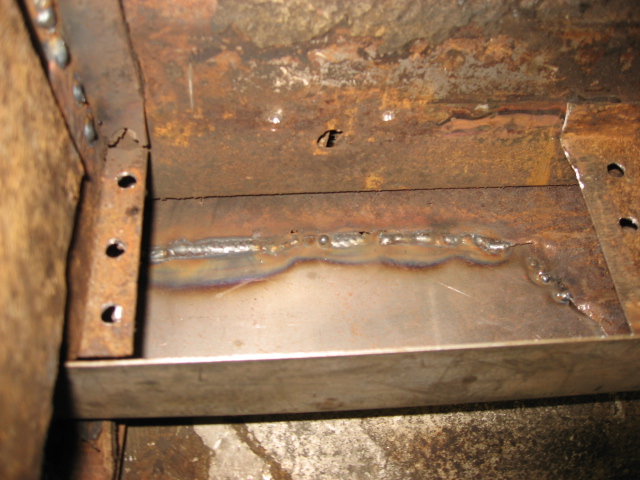
Here's the new piece welded in.
201532115611_2015_0321Commer0004.JPG


The metal's not very clean, but it's the best I can do without ripping off the coachbuilt outer skin. It will have to come off at some stage, but not now.

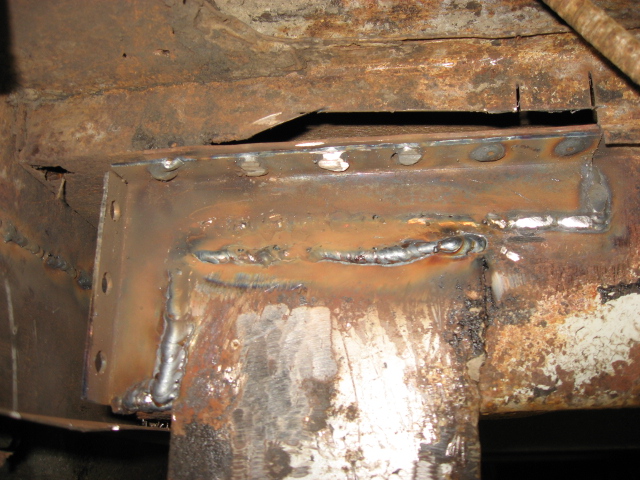
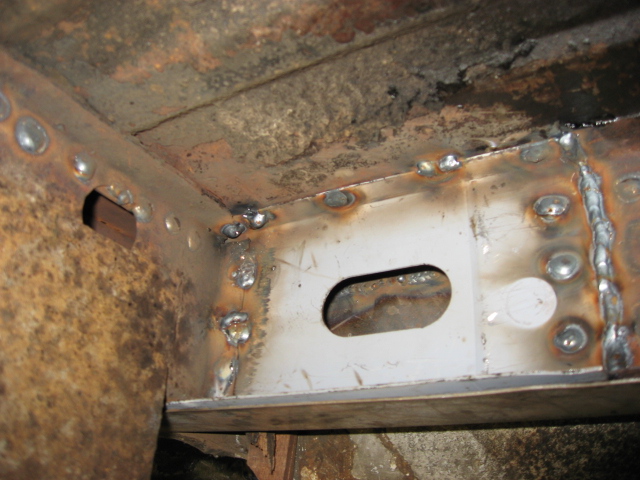
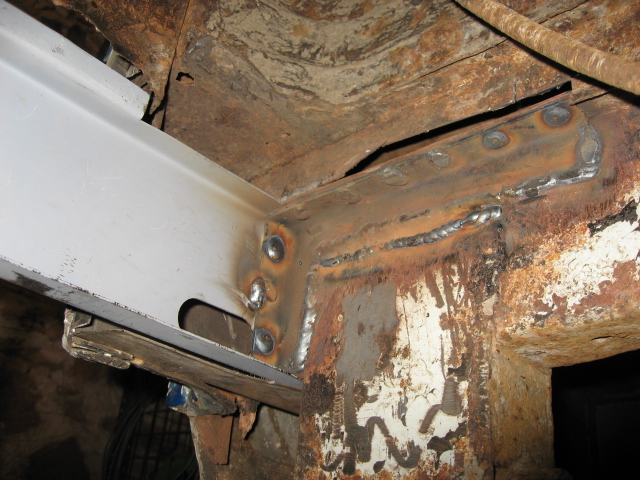
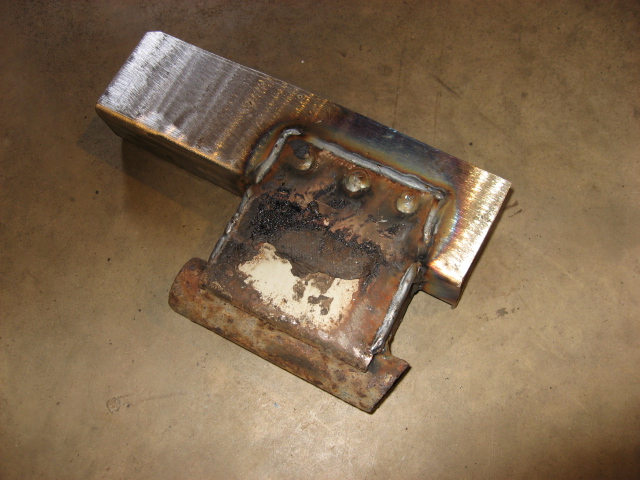
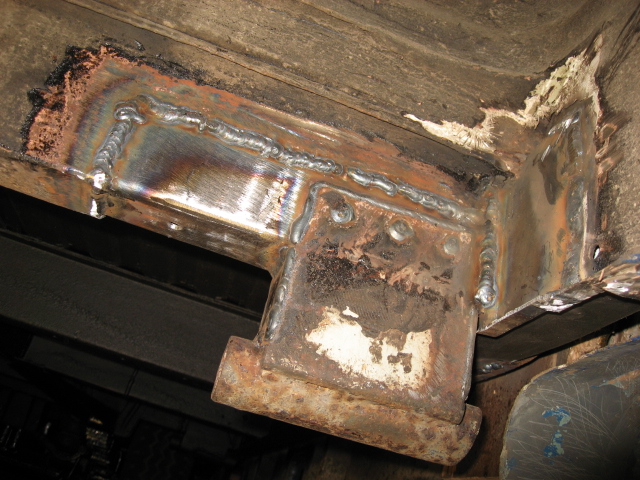
Once that was done, the front jacking point outrigger could be strengthened. The original JP wasn't bad, but the outrigger had a couple of small holes right at the top, and the top cover was flaky at the outer end. A new section of top cover was made up and plug welded to the other side of the outrigger, to avoid setting fire to the living area floor.
An L shaped piece was let into the side of the outrigger, and plug welded to the new top closer. Then I put a bead of weld along the top of the JP to keep water out.

201532115165_2015_0321Commer0005.JPG


Then I could position the inner cill. Slight problem here getting it really close to everything it had to be really close to, but eventually it was ready for welding.

2015321152044_2015_0321Commer0006.JPG


The plug welds top left are for the new top section of the outrigger. At this point my auto-darkening helmet started to play up, giving me arc-eyes, so a few of the plugs are a bit "guesswork". I had to cut the old inner cill quite short to get the front section out, so I plug welded a plate on the back of both, before butt welding the two sections of inner cill end to end. Then the driver's floor was plugged down to the inner cill, but I'll leave the rest of this area till the van is off the blocks, and I can open the door fully. I'm also leaving the bottom join of the outer cill, as I've got this to do all along both sides right to the back.

Here's the front of the outrigger all buttoned up, except for a bit of thin stuff to fill the holes and keep the mud out.

2015321152831_2015_0321Commer0007.JPG


I've tested the JP to see what happens when it takes weight, and there's no noticeable deflection anywhere.

Backtracking a bit, I had previously prepared an inner skin to join the wheel arch and inner cill, so this could now be welded in.

2015321153720_2015_0321Commer0008.JPG


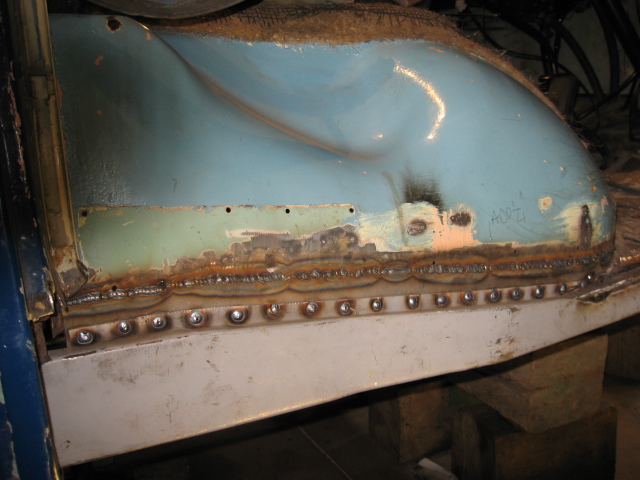
It was plug welded to the back of the inner cill, and seamed to the wheel arch. Quite difficult to get all the layers really close before tacking, but well worth messing around with clamps to get it right. There's real strength going back in now.

A lick with the grinder, and looking a bit better.

2015321154727_2015_0321Commer0009.JPG


Next will be to fit the outer drivers step, but before I do that, I've made up a new curved section for the bottom of the B post. This will also cover up a new small piece taking the weight of the B post onto the inner cill.

201532115566_2015_0321Commer0001.JPG


This all feels like a bit of progress after a few days of headscratching and going backwards. This is probably the most difficult bit of rebuilding I've done to date, so I had to take it real slow. Learning all the time.

Commer PB Jennings

 
So..........

The LAST BIT of structural repair.:):):)

Chopped out the front N/S front jacking point. Actually the JP itself was reasonably OK, but had to come out to get at the inner cill which sat behind it.

2015325204453_2015_0325Commer0002.JPG


On the right you can see a new repair piece. Part of a previous repair to the passengers step, which looks pretty solid, well carried out, and judging by that piece, not rusting away yet. So it looks like I won't need to redo any of that. Hey that's goood!

Made up a really strong section of outrigger complete with rebuilt JP to fit inside the original. Once again, the outrigger was cut horizontally to avoid getting too much heat in the floor when welding. This is getting kind of repetitive now.

2015325211242_2015_0325Commer0001.JPG


I tacked some spacers inside the new section, so that I could use a big G cramp to squeeze the old onto the new to tack it without deforming both.

2015325205028_2015_0325Commer0004.JPG


Once the small bit of inner cill was fixed in the whole thing was welded up.

2015325205213_2015_0325Commer0005.JPG


Just a couple of pieces to keep out the mud, and I've finished the structural stuff! Yay!:D:D

Now I need to put the front crossmember back on, so I can get the engine and brakes working. Then I'll be able to drive the van. It's not insured yet, so it will just be up and down the drive.


Commer PB Jennings
 
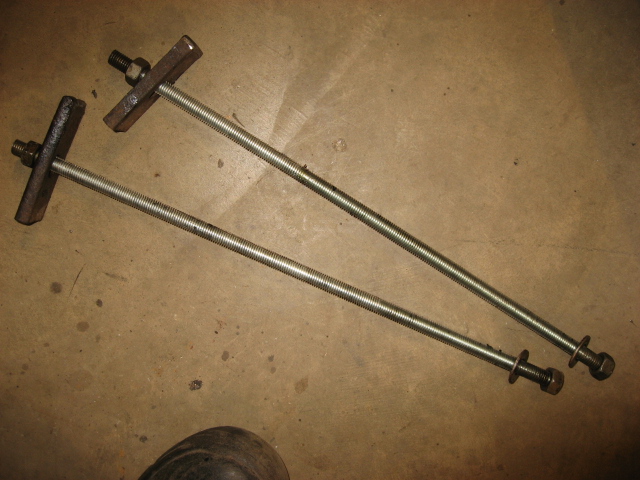
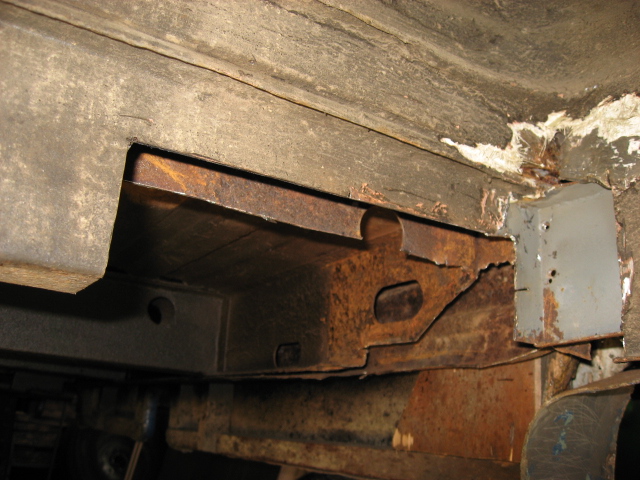
Front crossmember fitted yesterday. Just for the record, here's my spring compressors.

201532721367_2015_0325Commer0007.JPG


They are two 18inch lengths of 12mm threaded rod with a big plate at the bottom.

Fairly straightforward apart from fitting the engine mounts. What a pig of a job that was! The alternator had to come off again to line up the holes in the mounts with the crossmember. With no weight on the engine mounts the holes had no chance of lining up. With the weight of the engine bearing down it was some job to shuffle the holes into alignment. Oh well.It's done anyway. [}:)]

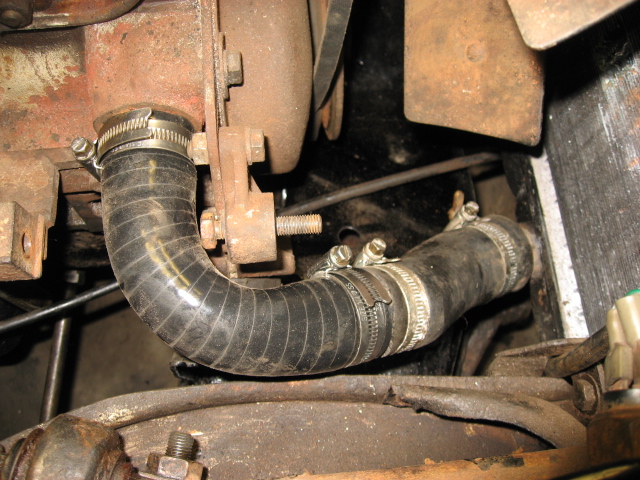
Whilst I've got the alternator off, here's my answer to that nasty little cast aluminium elbow, that was cracked and leaking. No chance of a new one.

2015327213956_2015_0327Commer0001.JPG


It's a slicone elbow from Auto Silicone Hoses, but they don't do the joiners in that size, so the joiner is made of a couple of plumbers 28mm yorkshire capillary straight joints on a short length of pipe. The swaged solder ridge stops the hoses from slipping off.

Bleed the brakes. Easy. Nice hard pedal. :)

Fill the cooling system. Easy. :) (Only water in case of leaks)

Fuel in the tank. Chucked a load of diesel on the floor and had to mop it up. Now the cleanest bit of the floor! Slight leak from the filler pipe. Easy fix.

Bleed the fuel system. Took a while, but eventually the engine started and ran OK.

Drive outside. Beryl moves slowly out blinking into the sunshine!:D

2015327214444_2015_0327Commer0003.JPG


Engine now warm. No leaks. :)

Engine sounding rough at idle. Something's not right.[:0]

Engine stops. Won't start again. :(

Change fuel lift pump. I always have a spare. ;)

Bleed fuel system again. [V]

Engine starts and runs. :)

Still running rough. [:0]

Engine won't start again after lunch. :(

Bleed fuel system again. [V]

Engine starts and runs. :)

Still running rough. [:0]

Repeat. Repeat. Repeat.

I'm getting loads of air out at the injection pump every time I bleed the system........So there's air getting in when it's running......... No sign of leaks as far as I can tell (the whole thing is by now soaked in diesel from bleeding the system)..........so air must be getting sucked in somewhere.......so any leak must be in the suction line from the tank to the lift pump. It's the only bit under negative pressure. Now there's a length of translucent pipe from the sediment bowl to the lift pump.........and hey presto when the engine is stopped, there is a stream of litlle bubbles rising up this bit of pipe from the (new) lift pump. That will be tomorrow's job then..............


Commer PB Jennings
 
Crikey you have been busy:) I remember removing a spring using a trolley jack under the bottom spring mount with the full weight of the van on it as I undid the bolts, scared the crap out of me:I Next time I'll use you method:)
I likes a good resto thread[^]
I was talking to a guy the other day who has put a Sherpa engine in a Minor, if I remember correctly that's a Perky - don't think he'll need to lower the front suspension to get the slammed look on that Moggy;)

41fa30c8-22ce-43e8-bd12-188475a80292.jpg
 
Back
Top