Jennings restoration

I remember on Tomorrows World many years ago a guy making pressed steel panels. He put down a grp former backed with thick concrete on the ground, laid a sheet of steel over the top, and detonated an explosive over the top of it all..........instant panels. I haven't got the bottle to do that though.

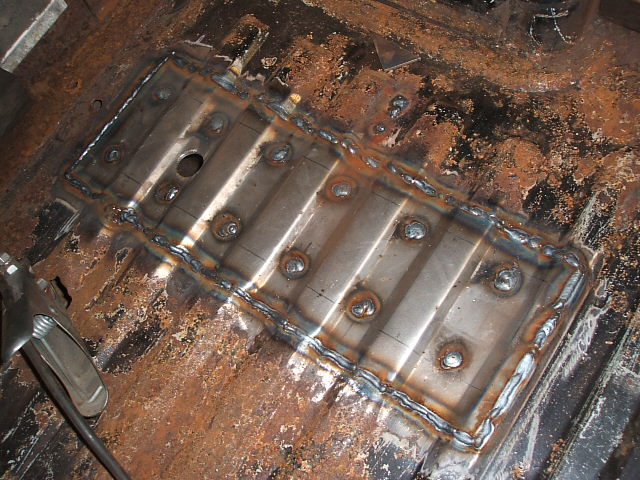
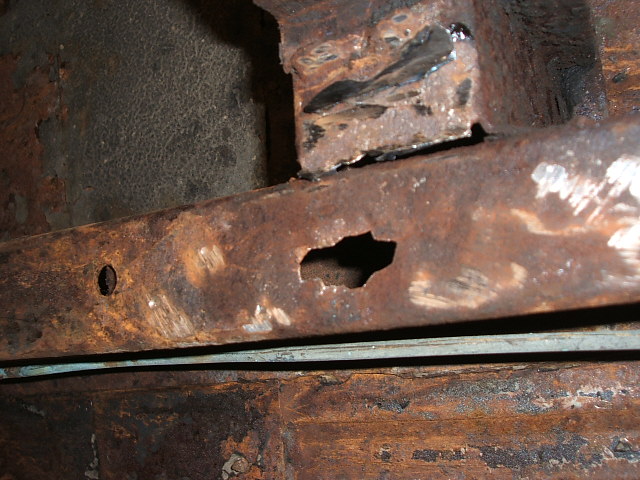
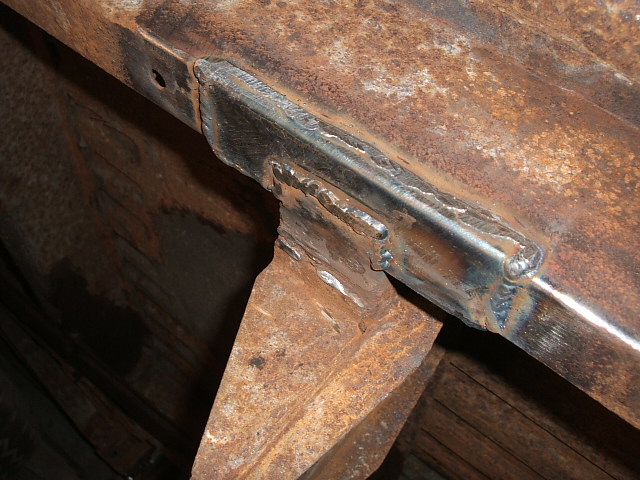
Anyway, another couple of floor panels over the repaired outriggers like this.

20151821135_2015_0107Commer0001.JPG


Then time to tackle a rear jacking point. Here's the old one cut out.
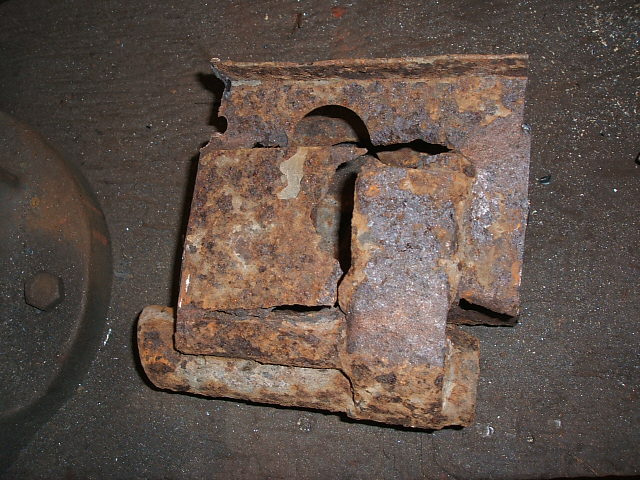
20151821152_2015_0107Commer0007.JPG


Then I made a box section out of 2mm to fit snugly inside the good remains of the original. Thankfully the tabs that attach to the inner sill were OK. That's not a rust hole in the inner cill by the way. Funny place to put a vent hole though.
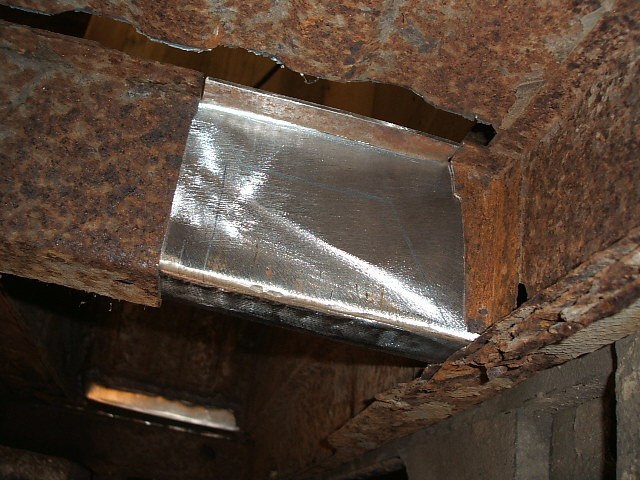
201518211725_2015_0107Commer0004.JPG


That method would produce the easiest (and strongest) welding of the new bit, as I could guarantee not blowing through the 2mm!

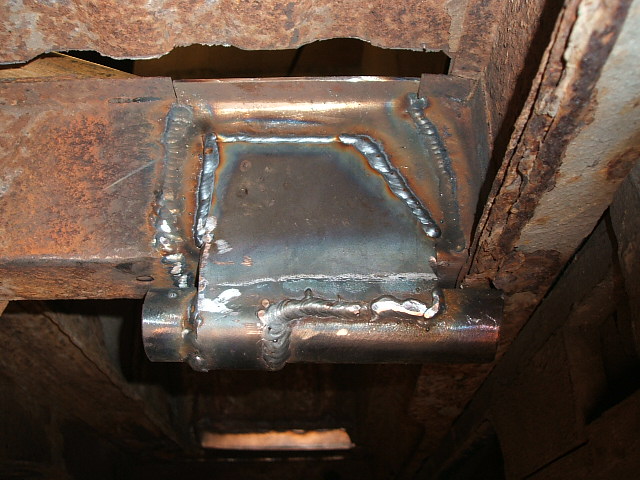
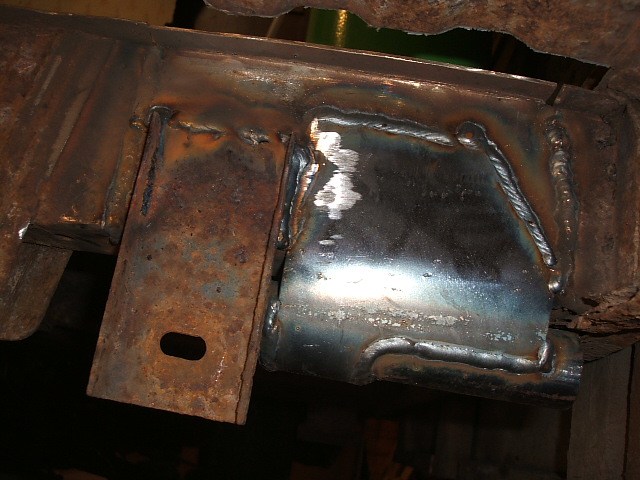
Then made up a jacking point.
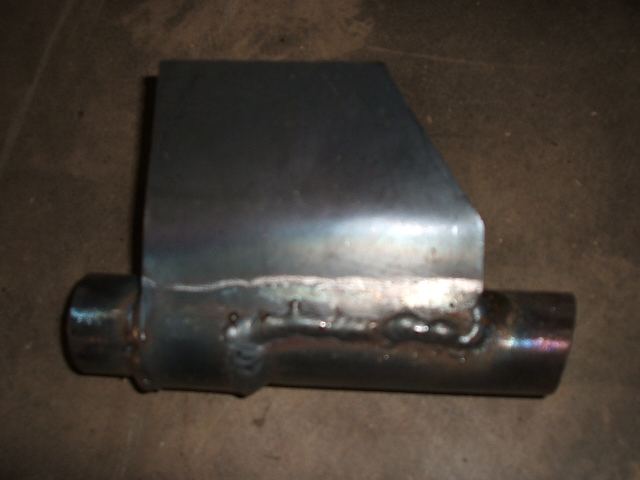
201518211927_2015_0107Commer0005.JPG


and welded it all in.

201518212023_2015_0107Commer0009.JPG


On to the nearside tomorrow hopefully.

Commer PB Jennings
 
My advice is to beef up the inside of the JP box section with some fillets or folded sheet before closing them off, they are not the strongest of constructions to begin with and it's quite alarming jacking up a coach built:I

41fa30c8-22ce-43e8-bd12-188475a80292.jpg
 
Thanks Panky. Yes I see you did that on yours. I'll jack it up before I close up, then I can see which way it flexes when stressed. On the other hand, my sections are 2mm steel which is quite a bit stronger than original.

Commer PB Jennings
 
And the originals hadn't collapsed so I suppose they are up to the job, but I like to be cautious;)

41fa30c8-22ce-43e8-bd12-188475a80292.jpg
 
Always impressed with the body and structural work you guys do over there. Here's a comparison for you, a 50 year old Australian jacking point on my Commer, all are the same condition as is all the underside.

20151952449_002.JPG


You can see where the under body sealant has been peppered with stones, a sort of mobile sand blasting, then coated with a fine film of dust that sets like cement. Mine was a country car and would have travelled many dirt roads in its day

When I get to the body work on mine I will certainly be checking the various threads as I think you guys have tackled everything and more than we in Australia would have encountered.

Cheers Stephen
 
I wish there was a better way to combat ice than chucking salt over our roads. That and farm waste is a corrosive enough cocktail, and regular rain keeps all that muck constantly wet. It's no surprise that our vehicles rot away in no time. Oh well...........

For what it's worth, my recipe for rust protection is:-

1. Clean off as much as possible

2. Cover with waxoil

3. Paint over with black bitumen paint, (which will stick over waxoil).

4. Use underseal, (which will stick over black bitumen) to fill any crevises still left.

5. Inspect annually and touch up with more black bitumen.

I fitted the other jacking point today.

201511020550_2015_0109Commer0002.JPG


Waxoiled the jacking point outriggers, then closed them up and replaced the floor patches.

2015110205754_2015_0109Commer0005.JPG


I din't make access holes in the sides of the new outriggers. That was the cause of the rot in the first place. So the hole in the top is an alternative access for waxoiling.

So apart from a few small patches, I'll soon be able to think about putting down the new plywood floor. I'll design it with access for maintenance and repairs in mind so I don't have to take it all up next time. NEXT TIME? What am I talking about. Surely there won't be a next time.


Commer PB Jennings
 
Yes, my welding Mojo comes and goes, who knows when and where. I practice at my workbench till I get it right, but then as soon as I'm welding lying on my back all I get some days is chicken pooh. Getting ALL the right conditions seems to be all important. But a few good welds soon puts the smile back on my face. I've learned so much from this exercise.

I make sure I'm wearing my lucky socks too.


Commer PB Jennings
 
Anyway, what was I saying about my welding Mojo coming and going? Well, today it has left the building altogether. Turned the lucky socks out of the linen basket but no change........

All that heavy duty stuff seems to have worn the torch liner, and the wire speed is all erratic, so things are a bit on hold while I get a replacement. Would you believe the liners are PVC. How cheap and nasty is that? Now I have found out they should be replaced regularly.

But the good news is that I got the inside all buttoned up (even if the last little bit of weld isn't so neat) so I can get on with the plywood floor meanwhile.

Commer PB Jennings
 
So..............

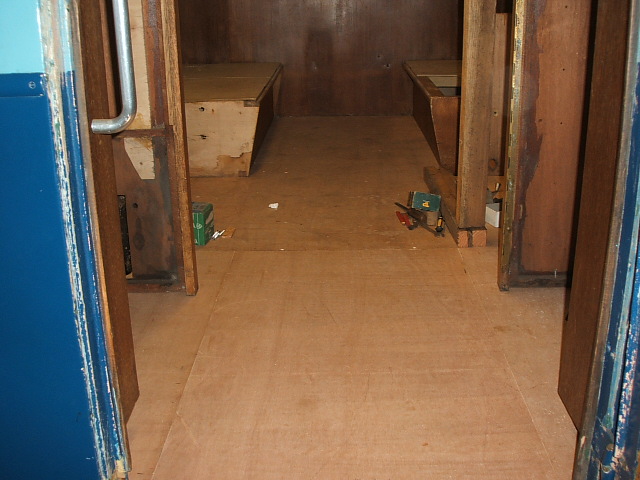
While I'm waiting for welder parts to arrive (The person who deals with mail order is off sick [:(!]), I have painted the load floor, together with sundry supporting metalwork, replaced the timber bearers and trial fitted the new plywood floor.

2015115202721_2015_0114Commer0001.JPG


I had to support the vehicle on the new jacking points and raise the back of the coachbuilt part a few mm to take the weight off the partitions, so I could slide the plywood under.

Then it all came back out again for painting under the rear section of ply, plus all the brackets and sundry metalwork.

Today the floor went back in, for keeps this time.

201511520340_2015_0114Commer0002.JPG


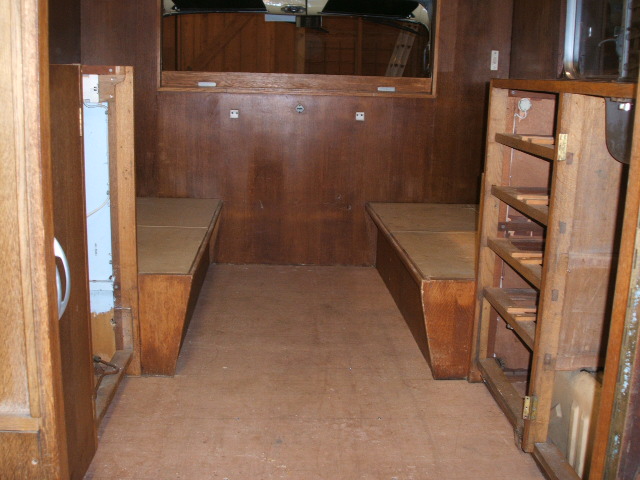
Before I could fix the floor to the rear crossmember, the furniture units had to all go back in and the cills fixed to the wardrobe and toilet doorways, so I knew exactly where the rear wall with the door was to be. It has been a challenge to work out from the broken, patched and badly fitted parts what the original design intent was, but once I'd got it sussed and made a few new components, it all went into place. Now the back door is a much better fit, and everything looks nice and square. The wardrobe and toilet doors will fit properly too.

Now I've done that it has become obvious that there is a large space between the back of the chassis and the rear of the coachbuilt where I could fit an underslung waste tank. The gas bottle store occupies the nearside, leaving the offside available for the tank. Seems a pity to waste this space so I'll have a look at the KAK tanks website to see what they've got.

Commer PB Jennings
 
Great work i know what involved in doing these timber replacements alot of thinking and time and RUM well done

Such is Life

e754d6ee-8a0d-477f-8642-4a3bfbd24b90_zpsd0b5718d.jpg
 
Well I woke up this morning (sounds like a classic blues song!) and realised that I still had a problem lining up the rear end. So I spent an hour measuring up and discovered that the problem had arisen last time it was repaired. Luckily, an hour's work got it all straightened out and the toilet door fitting OK without any major dismantling. As you say Frank, better an hour's thinking time than two hours' cock-up time!

Anyway, today I've restored the fitted units back to original spec, and cut up all the bodges for firewood. I made a proper engineering job of the fuel filler and vent tube, and I'm starting to see how it will all look inside when it's finished.

The welder parts turned up, so I was able to copy, trial fit, then weld up some more bracketry at the back end.

I can't understand why a previous owner found it neccessary to put both batteries in the living area in the bed boxes, when there's perfectly good battery carriers behind each front seat. The heavy duty wiring is also obviously designed for having both batteries in the cab. Any ideas people? Perhaps it was just to hide them from view. Yet another bodge to unpick!

Oh well...........


Commer PB Jennings
 
Oh, and...........

We had some friends over this evening, and after some (probably too much) wine, the van has been officially named as BerYL, due to its reg letters and curvacious front. Brits: Think Beryl Cook here! Aussies: Gooooogle "Beryl Cook".

Just thought you'd need to know this important development.

Commer PB Jennings
 
Good name:)
Bonnie's batteries are under the nearside front bench seat, as you say it doesn't look like a very professional job but there's no sign of them being anywhere else. But then again she did originally have a fold down bench seat/bed in the cab and batteries in their proper position would have got in the way.

41fa30c8-22ce-43e8-bd12-188475a80292.jpg
 
Good point Panky, but we won't be having a bed in the cab, so that's where the batteries will be.

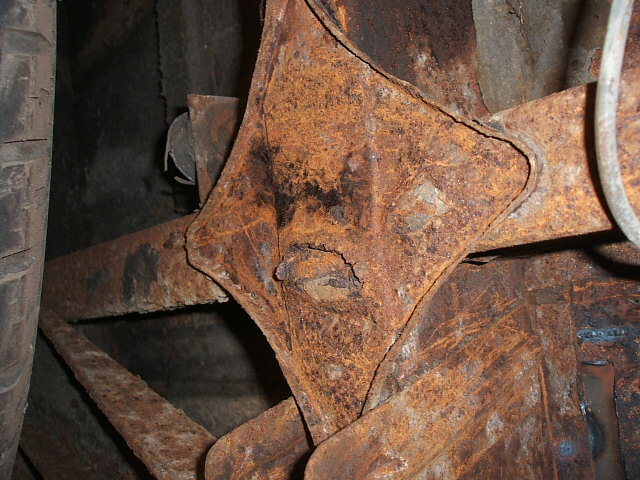
Today I had a closer look at those diamond shaped plates where the chassis legs cross over.

They look innocuous enough.

201511721633_2015_0116Commer0001.JPG


I'm not sure how the designers thought that these plates, held on with a few spotwelds, were going to strengthen the structure. A good few of the welds had popped anyway.

201511721914_2015_0116Commer0004.JPG


And behind these plates, you can see how they have acted as a rust trap to corrode the chassis behind.

2015117211133_2015_0116Commer0002.JPG


So they all have to be unpicked and patched.

201511721130_2015_0116Commer0003.JPG


One down, three to go, and I've run out of gas...........


Commer PB Jennings
 
Yes indeed, I can feel the van stiffening up as I strengthen it. But it was still passing MOTs and I reckon it wouldn't have failed the next MOT on bodywork either, as none of it would fail the "Finger and thumb pressure" test.

Commer PB Jennings
 
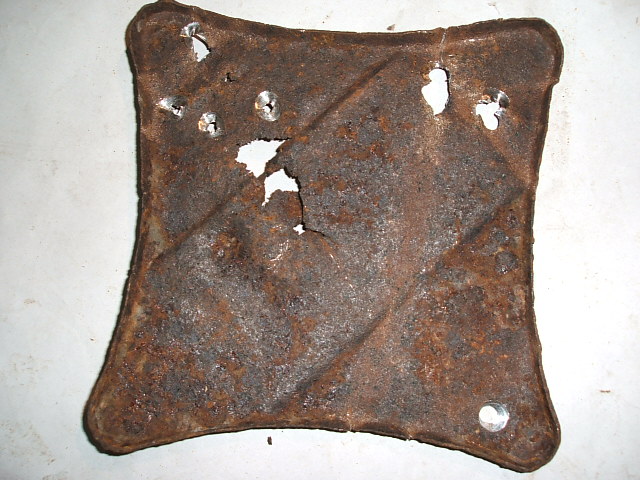
Coincidentally, for my coming MoT I have just replaced one of mine

chassisplate_zpsce36a926.jpg


Spot welds were good but the strengthening was a bit suspect...I suspect;)

65a8f281-2f60-4744-b9e8-1facc4450bd9_zps403d6d8b.jpg

What's one more project...
 
Shoddy, just shoddy:I And a beautifully captured image on a flawless black velvet background:)

41fa30c8-22ce-43e8-bd12-188475a80292.jpg
 
Back
Top