
You are using an out of date browser. It may not display this or other websites correctly.
You should upgrade or use an alternative browser.
You should upgrade or use an alternative browser.
The New Project
- Thread starter Suinnyboy
- Start date


Very very nice... Not as brave as you... Hate wiring me!
The Blue Toaster
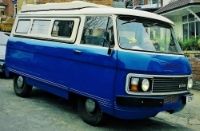
The Blue Toaster

I'm very interested to see what you're doing. Should be a good upgrade.
You can achieve a single dash repeater for indicators very simply by using a couple of diodes, one from left, and one from right to the single indicator bulb. I usually get them from scrap computer power supplies.
Commer PB Jennings
You can achieve a single dash repeater for indicators very simply by using a couple of diodes, one from left, and one from right to the single indicator bulb. I usually get them from scrap computer power supplies.
Commer PB Jennings

Hi all
Been off the electrics since the last update, the oil cooler, hose and fittings arrived and got stuck into getting that sorted. With most of motor and accessories in place in the engine bay it took a lot of experimenting as to where the best place for the remote oil filter, plus planning where the hoses to it from the motor and then the run to the oil cooler need some very deep thought.
The first drama that needed to be resolved was the actual remote oil filter kit. The remote filter part that is fitted to the engine has a choice of imperial or metric. The Nissan Z24 motor takes the imperial thread, so that was quickly sorted. Unfortunately there was no option with the remote filter body, it had a Metric M20 tread. So a quick hunt on the web and started checking the Ryco filter catalogue. eventually found some Renaults had M20 filters, noted the number and headed off to Supercheap Auto. Once there I found the filter and discovered this tiny little thing, yes it had a M20 thread, but was about 2.5" diameter and 1.5" long! The fuel filter on my 2.5pi Triumph is bigger, so started hunting through the catalogue hanging from the shelf and eventually came across an unlikely donor, the Rover 416i (yes I know it's a Honda we had them here too). They seemed to have been made with both Metric and Imperial threads, and the filter was compact, compared to the huge old Z9 filter and probably twice the size of the Renault filter, SOLD!
Now with a filter fitted to the remote filter I could spend endless hours holding it in different places and positions in the engine bay thinking about where and what the oil would leak over when doing future oil filter changes and if I could actually get my hand to it or oil filter spanner if necessary and the spaghetti of oil lines each position would create. Stressed I decided to have a look at positioning the oil cooler, surely that wouldn't be too difficult, wrong again! After loosely re-assembling the steering arms etc, it became obvious that the passenger side was pretty straight forward ,but the drivers side has the mounting for the steering relay assembly in the way (insert colourful language here). Having a closer look it wasn't insurmountable and thought a couple of spacers and longer bolts on the lower steering relay mounts would be fine. The spacers were easy, Triumph saloons have spacers about 1.25" long between the g/box cross member and the body mounts on the automatic models. I converted the 2500pi Estate and a 2000 saloon to manual years ago and the spacers were in my bucket of nut & bolts. While working on the cooler mount it occurred to me there is plenty of space above where the oil cooler will eventually be, why not mount the remote filter above it, out of the engine bay, forward of the radiator. I checked positions and oil hose runs and got to work.
This is the cooler mounting with the cooler & remote filter roughly in place.
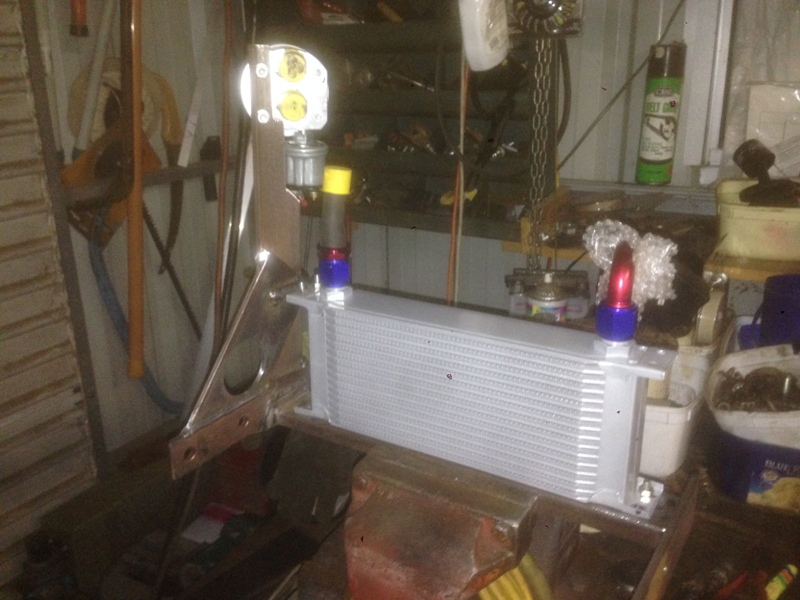
The Remote filter fixes to 1.5" angle, cooler isn't quite lining up at this stage, but a few adjustments and it was much better.
Here it is now in place in the van
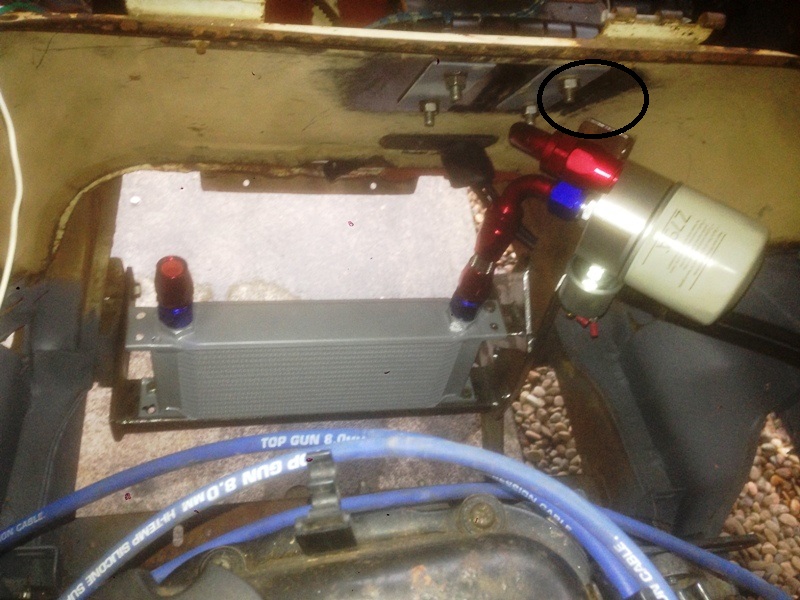
Since this shot I have made a top mounting that picks up the top of the angle and bolts to the marked bolt/nut that holds the gear lever assembly in place. The short hose from the remote filter to the cooler is short, but the whole assembly is quite ridged and the shold be little or no movement to put load on the fitting or cooler.
Now with the hoses from the motor connected to the remote oil filter and cooler.
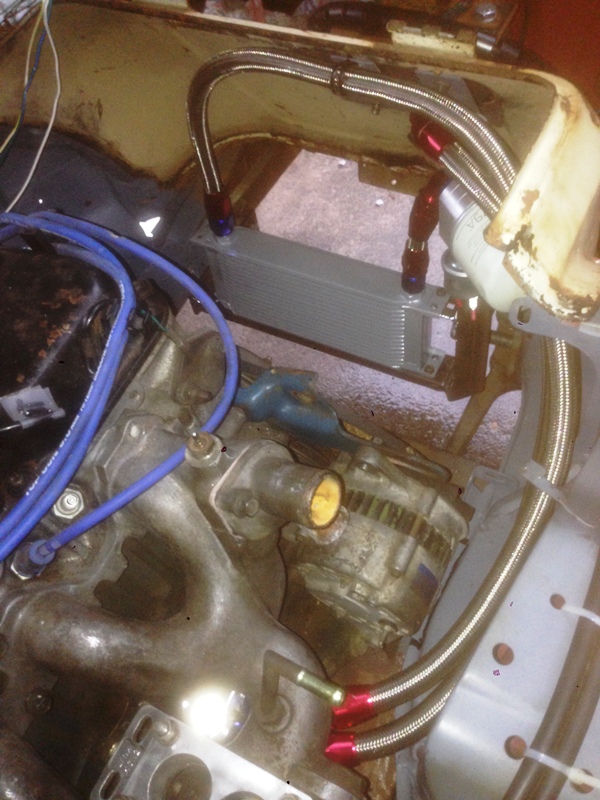
The hoses from the motor will run through the space between the side of the radiator and the body work. Will sort out some mounts/clips to hold the hoses in place.
A view of the Remote filter.
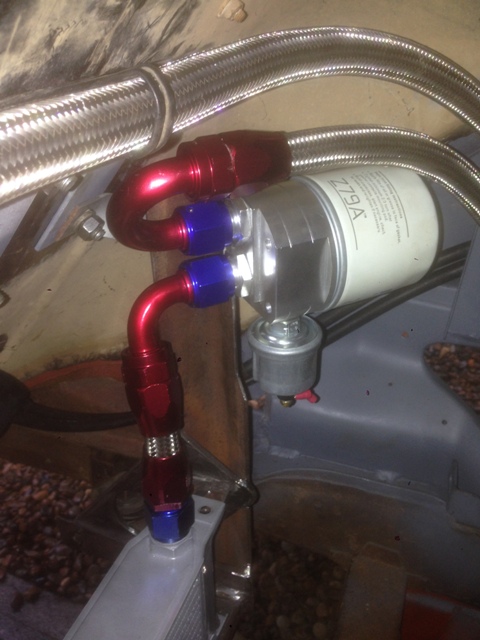
Oil Cooler kit came with 8 hose fittings, 2 straight 2 x 90deg bends, 2 x 45deg bends and 2 x 180deg bends, though I would never use the 180's, very glad they were included. You can also see the Oil pressure gauge/warning sender unit, single unit sends signal to the oil pressure gauge, with a second terminal for the low oil pressure warning light. The oil temperature sender is hidden from view. Now they are in place I can work out where to run the wires for them.
Looking underneath from the front
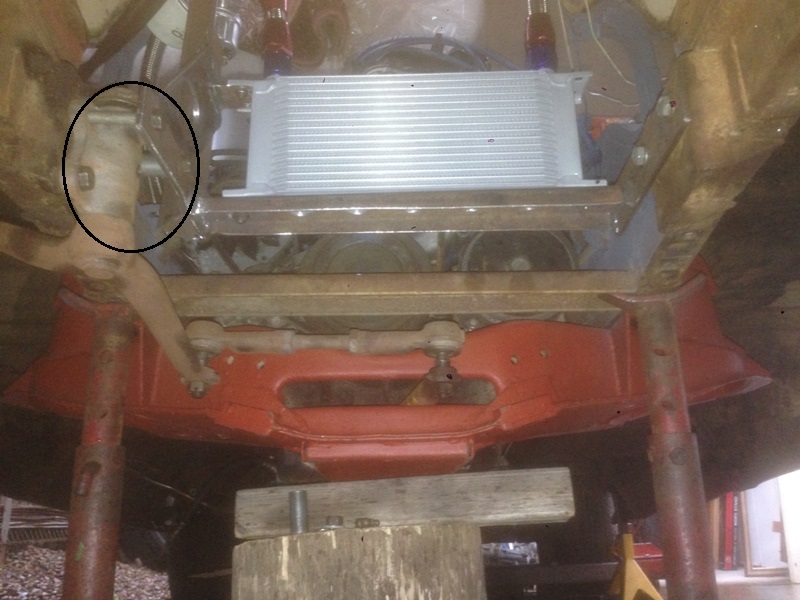
The circle shows where the bracket had to be spaced out. Spacer only fitted to the rear bolt in this shot, you can see the other sitting on the block of wood under the cross member. I was originally going to use the lower set of bolts, but remembered the sway bar after I had made the initial mounting, then discovering they would fouled each other, so moved to the upper set. Cooler is set back so cool air can still travel over it to the radiator. Having it set back also gave me the space above for the remote oil filter location.
So that's another job done, have now contacted Miss Piggy's Rootes parts mate in Queensland about a 2nd hand radiator and hope to get that organised and shipped next week. Unfortunately daylight saving ends next weekend 11/12 April, which will make it a little difficult working on the electrics in the afternoon after work. The van is outside the shed and have got my fluoro work light ready to go, so will push on and light a couple of mozzie coils and see how things work out. I planned on making the most of daylight saving this year and extremely happy with where I am now, considering I only re-commenced work on the van once I had relocated it at the beginning of December
Cheers for now
Stephen
Been off the electrics since the last update, the oil cooler, hose and fittings arrived and got stuck into getting that sorted. With most of motor and accessories in place in the engine bay it took a lot of experimenting as to where the best place for the remote oil filter, plus planning where the hoses to it from the motor and then the run to the oil cooler need some very deep thought.
The first drama that needed to be resolved was the actual remote oil filter kit. The remote filter part that is fitted to the engine has a choice of imperial or metric. The Nissan Z24 motor takes the imperial thread, so that was quickly sorted. Unfortunately there was no option with the remote filter body, it had a Metric M20 tread. So a quick hunt on the web and started checking the Ryco filter catalogue. eventually found some Renaults had M20 filters, noted the number and headed off to Supercheap Auto. Once there I found the filter and discovered this tiny little thing, yes it had a M20 thread, but was about 2.5" diameter and 1.5" long! The fuel filter on my 2.5pi Triumph is bigger, so started hunting through the catalogue hanging from the shelf and eventually came across an unlikely donor, the Rover 416i (yes I know it's a Honda we had them here too). They seemed to have been made with both Metric and Imperial threads, and the filter was compact, compared to the huge old Z9 filter and probably twice the size of the Renault filter, SOLD!
Now with a filter fitted to the remote filter I could spend endless hours holding it in different places and positions in the engine bay thinking about where and what the oil would leak over when doing future oil filter changes and if I could actually get my hand to it or oil filter spanner if necessary and the spaghetti of oil lines each position would create. Stressed I decided to have a look at positioning the oil cooler, surely that wouldn't be too difficult, wrong again! After loosely re-assembling the steering arms etc, it became obvious that the passenger side was pretty straight forward ,but the drivers side has the mounting for the steering relay assembly in the way (insert colourful language here). Having a closer look it wasn't insurmountable and thought a couple of spacers and longer bolts on the lower steering relay mounts would be fine. The spacers were easy, Triumph saloons have spacers about 1.25" long between the g/box cross member and the body mounts on the automatic models. I converted the 2500pi Estate and a 2000 saloon to manual years ago and the spacers were in my bucket of nut & bolts. While working on the cooler mount it occurred to me there is plenty of space above where the oil cooler will eventually be, why not mount the remote filter above it, out of the engine bay, forward of the radiator. I checked positions and oil hose runs and got to work.
This is the cooler mounting with the cooler & remote filter roughly in place.
The Remote filter fixes to 1.5" angle, cooler isn't quite lining up at this stage, but a few adjustments and it was much better.
Here it is now in place in the van
Since this shot I have made a top mounting that picks up the top of the angle and bolts to the marked bolt/nut that holds the gear lever assembly in place. The short hose from the remote filter to the cooler is short, but the whole assembly is quite ridged and the shold be little or no movement to put load on the fitting or cooler.
Now with the hoses from the motor connected to the remote oil filter and cooler.
The hoses from the motor will run through the space between the side of the radiator and the body work. Will sort out some mounts/clips to hold the hoses in place.
A view of the Remote filter.
Oil Cooler kit came with 8 hose fittings, 2 straight 2 x 90deg bends, 2 x 45deg bends and 2 x 180deg bends, though I would never use the 180's, very glad they were included. You can also see the Oil pressure gauge/warning sender unit, single unit sends signal to the oil pressure gauge, with a second terminal for the low oil pressure warning light. The oil temperature sender is hidden from view. Now they are in place I can work out where to run the wires for them.
Looking underneath from the front
The circle shows where the bracket had to be spaced out. Spacer only fitted to the rear bolt in this shot, you can see the other sitting on the block of wood under the cross member. I was originally going to use the lower set of bolts, but remembered the sway bar after I had made the initial mounting, then discovering they would fouled each other, so moved to the upper set. Cooler is set back so cool air can still travel over it to the radiator. Having it set back also gave me the space above for the remote oil filter location.
So that's another job done, have now contacted Miss Piggy's Rootes parts mate in Queensland about a 2nd hand radiator and hope to get that organised and shipped next week. Unfortunately daylight saving ends next weekend 11/12 April, which will make it a little difficult working on the electrics in the afternoon after work. The van is outside the shed and have got my fluoro work light ready to go, so will push on and light a couple of mozzie coils and see how things work out. I planned on making the most of daylight saving this year and extremely happy with where I am now, considering I only re-commenced work on the van once I had relocated it at the beginning of December
Cheers for now
Stephen

Well done dude your a brave man to venture into the world of wiring i'm still waiting for my sparky to come back lucky i'm not in a hurry.
Glad you could use the radiator, well done
Such is Life

Glad you could use the radiator, well done
Such is Life
Thanks Frank, think your sparky needs some of those bravery pills I took before I took on the electrical transplant. With the oil system off the list, I'm back on the electrics with a clear head.
After poking around and re-familiarising myself, I decided to throw a battery in the van and see if anything actually worked. Unfortunately the spare battery was flat, so fitted it anyway and threw the battery charger on it so I had some power at least, connected some earth wires and fitted some light globes.
The good news is things seemed to work, Low Oil Pressure warning light worked when I turned the key to "on" which was a good start. Then connected the Ignition warning wire to the alternator and that worked too. Whether it will turn off when the motor runs I'll have to wait and find out. The Triumph 2500pi loom is designed for an alternator with built in regulator, though the Nissan Z24 motor has a 65 amp Hitachi alternator over the tiny 28 amp 15ACR Lucas the Triumph had.
I then realised the water & oil temperature plus fuel gauges were at maximum, so something not quite right there and disconnected the power to them for the moment and moved on. Next tried the lights, the instrument lights, side, main and hi-beam & flash worked fine.
As mentioned previously the 2500pi has 2 extra positions on main light switch over the standard 2000 & 2500 TC's, firstly turn the knob backward and you have f/r drivers-side only parking lights, which also worked. The second, when you turn the rotary headlight switch to the last "fog" position it turns off the main beam and power goes to the two fog light connectors pre-wired in the factory loom, these also had power.
Next I tried my luck with the indicators, I was keen to see if my twin LED indicator dash warning light I created actually worked. Ignition set to "on" select left then right, nothing. I realised it might work if I fit the blinker/flasher unit, but still no luck and thinking the worst. After checking the wiring diagram and re-plugging the blinker unit into the correct wires and not those for the brake light switch, they all worked. While I knew where the brake light switch wires were, I fitted a toggle switch and confirmed that worked too.
I currently only have the front loom roughly in place, so when testing the lights I have been checking the terminals were the 2 looms connect and they all worked fine.
Next I grabbed the wiper motor and washer bottle from the Triumph and plugged them in. They worked fine, slow then fast and single sweep and the washer motor buzzed away merrily. Problem is the wiper motor on my Commer is single speed, I would prefer to have a 2 speed if possible. Did the later Dodge versions have 2 speed wipers?? If yes is the wiper motor interchangeable with the earlier?? Just like to confirm this before I consider ways to convert/adapt something.
By this time the I thought the old battery would have had some charge in it and was now time to go one better and turn the key past "on" to "start". You know that horrible sound you get when your battery is flat and the starter just goes click-click-click as the solenoid kicks in but the starter struggles to turn the motor, if at all. Well for the first time in my life that was music to my ears, it worked, well sort of. I think the battery is knackered as it's condition didn't improve as the day progressed, but it was engaging the solenoid with a good clunk, so I pretty sure the starter is sorted.
I had been leaving the ignition until last as I expected problem here, and I was right. After numerous attempts and test I just couldn't get any power at the coil or ballast resistor. After some studying of the electrical drawing it seems to originate around the wiring of the Smiths Tacho in the Triumph. From experience the Smiths Tacho needs a loop wire that runs up to it then back to the coil. this is not necessary for the VDO tacho. In addition there is added wiring that sends the full 12v to the coil when cranking the motor in "Start" for easier starting, then reverts to 6v when running in the "on" position. I understood where the errors were and did a little temporary wiring, which got me power to the coil and distributor, so will need to make these couple of minor changes permanent so things are right.
That leaves the problem with the oil/water temp & fuel gauges going to full scale when the ignition is "on". Strangely the electric oil pressure gauge and tacho stay a zero. They all currently take their power from the voltage stabiliser, even when I disconnect the VDO gauges and leave the original fuel gauge connected, it still goes full to scale. I remember the voltage stabiliser playing up on my 2.5pi Saloon many years ago, and the gauges went a bit wacky. I will take the one off the 2.5pi Saloon as I know that worked, though it hasn't been used in 20 years, do they go off with age?? Well at least it's somewhere to start.
So, overall very happy, and can hopefully sort the few problems, and start planning the final positioning of the various wires to and in the engine bay, then work towards the rear of the van.
Cheers for now
Stephen
After poking around and re-familiarising myself, I decided to throw a battery in the van and see if anything actually worked. Unfortunately the spare battery was flat, so fitted it anyway and threw the battery charger on it so I had some power at least, connected some earth wires and fitted some light globes.
The good news is things seemed to work, Low Oil Pressure warning light worked when I turned the key to "on" which was a good start. Then connected the Ignition warning wire to the alternator and that worked too. Whether it will turn off when the motor runs I'll have to wait and find out. The Triumph 2500pi loom is designed for an alternator with built in regulator, though the Nissan Z24 motor has a 65 amp Hitachi alternator over the tiny 28 amp 15ACR Lucas the Triumph had.
I then realised the water & oil temperature plus fuel gauges were at maximum, so something not quite right there and disconnected the power to them for the moment and moved on. Next tried the lights, the instrument lights, side, main and hi-beam & flash worked fine.
As mentioned previously the 2500pi has 2 extra positions on main light switch over the standard 2000 & 2500 TC's, firstly turn the knob backward and you have f/r drivers-side only parking lights, which also worked. The second, when you turn the rotary headlight switch to the last "fog" position it turns off the main beam and power goes to the two fog light connectors pre-wired in the factory loom, these also had power.
Next I tried my luck with the indicators, I was keen to see if my twin LED indicator dash warning light I created actually worked. Ignition set to "on" select left then right, nothing. I realised it might work if I fit the blinker/flasher unit, but still no luck and thinking the worst. After checking the wiring diagram and re-plugging the blinker unit into the correct wires and not those for the brake light switch, they all worked. While I knew where the brake light switch wires were, I fitted a toggle switch and confirmed that worked too.
I currently only have the front loom roughly in place, so when testing the lights I have been checking the terminals were the 2 looms connect and they all worked fine.
Next I grabbed the wiper motor and washer bottle from the Triumph and plugged them in. They worked fine, slow then fast and single sweep and the washer motor buzzed away merrily. Problem is the wiper motor on my Commer is single speed, I would prefer to have a 2 speed if possible. Did the later Dodge versions have 2 speed wipers?? If yes is the wiper motor interchangeable with the earlier?? Just like to confirm this before I consider ways to convert/adapt something.
By this time the I thought the old battery would have had some charge in it and was now time to go one better and turn the key past "on" to "start". You know that horrible sound you get when your battery is flat and the starter just goes click-click-click as the solenoid kicks in but the starter struggles to turn the motor, if at all. Well for the first time in my life that was music to my ears, it worked, well sort of. I think the battery is knackered as it's condition didn't improve as the day progressed, but it was engaging the solenoid with a good clunk, so I pretty sure the starter is sorted.
I had been leaving the ignition until last as I expected problem here, and I was right. After numerous attempts and test I just couldn't get any power at the coil or ballast resistor. After some studying of the electrical drawing it seems to originate around the wiring of the Smiths Tacho in the Triumph. From experience the Smiths Tacho needs a loop wire that runs up to it then back to the coil. this is not necessary for the VDO tacho. In addition there is added wiring that sends the full 12v to the coil when cranking the motor in "Start" for easier starting, then reverts to 6v when running in the "on" position. I understood where the errors were and did a little temporary wiring, which got me power to the coil and distributor, so will need to make these couple of minor changes permanent so things are right.
That leaves the problem with the oil/water temp & fuel gauges going to full scale when the ignition is "on". Strangely the electric oil pressure gauge and tacho stay a zero. They all currently take their power from the voltage stabiliser, even when I disconnect the VDO gauges and leave the original fuel gauge connected, it still goes full to scale. I remember the voltage stabiliser playing up on my 2.5pi Saloon many years ago, and the gauges went a bit wacky. I will take the one off the 2.5pi Saloon as I know that worked, though it hasn't been used in 20 years, do they go off with age?? Well at least it's somewhere to start.
So, overall very happy, and can hopefully sort the few problems, and start planning the final positioning of the various wires to and in the engine bay, then work towards the rear of the van.
Cheers for now
Stephen

Satisfying and frustrating, but more satisfaction I think[^] The gauges wouldn't be out of a positive earth vehicle by any chance?
There is a two speed wiper motor fitted to the Dodge, but I'm pretty sure the casing is a different shape and wont fit under the Commer cover panel, but I'm sure it's not insurmountable - that's if they imported that model into Australia:I

Commerfest 2015 is happening. Contact me for details
There is a two speed wiper motor fitted to the Dodge, but I'm pretty sure the casing is a different shape and wont fit under the Commer cover panel, but I'm sure it's not insurmountable - that's if they imported that model into Australia:I
Commerfest 2015 is happening. Contact me for details
Firstly it's great to see the site back on line, got a fright when I couldn't get my Commer fix! Now just have to figure out all the new features, a bit like finding your favorate radio station in someone elses car, you get there eventually get it right. Well done to all involved
Thanks Panky for your last comment,
Yes, satisfying and quite exciting seeing things actually working. VDO Gauges have separate positive and negative connections so they work on any polarity. Checked the wires again and realised the two problem gauges had the power and signal wires back to front. now changed and behaving properly.
We didn't get the later Dodge versions in Australia, the "Darkside" and early Japanese vans had taken over by then. There's a Triumph Dolomite wiper motor that looks promising, though not sure about space, it's pretty limited up there. Had a walk around the wreckers the other day, as you do, and notice there are a lot of very compact wiper motors on those modern cars that other people drive. Will have a look at that path in the coming weeks.
Thanks to Miss Piggy's lead, I managed to get hold of an original radiator from his parts mate in Queensland. A real bargain, considering the amount of bubble wrap I got! Thanks John if you happen to read this, contact him on [email protected] if you are looking for Rootes parts in Australia, he may just have what you need.
So now with a radiator I crossed my fingers and went to see how I was going to manage the Radiator hose connections. Well the first setback was that the oil filter just cleared the radiator core, but was hitting against the metal radiator surround and there was no way that a filter change would be possible. So I headed back to Supercheap AutoParts and bought one of the tiny Renault Z608 filters that I mentioned earlier, which fitted perfectly with room to spare.
View attachment 29
The good news was that the front of the water pump pulley shaft cleared by more than I was expecting and the bottom radiator outlet sits lower than the alternator pulley, and there was some space between it and the radiator to run th hose, though the bottom fitting of the radiator will need to be replaced.
At the top it was much the same with enough space to run a hose between the radiator top tank and the front of the rocker cover to connect with the motor. I will be running a push/blow through type 12" thermo fan on the radiator, so the 2.5" space between the oil cooler and radiator will be enough for one of the "slimline" versions that are now available.
Since the photo above was taken, I have unsoldered the top fan cowl and replaced the old inlet pipe with a 90 degree elbow angled toward the Drivers side
That's it for now, weather has been foul here in Sydney with heavy rain, high winds and low temperatures, so haven't been outside or in the shed. Fingers crossed for the weekend
Cheers Stephen
Thanks Panky for your last comment,
Yes, satisfying and quite exciting seeing things actually working. VDO Gauges have separate positive and negative connections so they work on any polarity. Checked the wires again and realised the two problem gauges had the power and signal wires back to front. now changed and behaving properly.
We didn't get the later Dodge versions in Australia, the "Darkside" and early Japanese vans had taken over by then. There's a Triumph Dolomite wiper motor that looks promising, though not sure about space, it's pretty limited up there. Had a walk around the wreckers the other day, as you do, and notice there are a lot of very compact wiper motors on those modern cars that other people drive. Will have a look at that path in the coming weeks.
Thanks to Miss Piggy's lead, I managed to get hold of an original radiator from his parts mate in Queensland. A real bargain, considering the amount of bubble wrap I got! Thanks John if you happen to read this, contact him on [email protected] if you are looking for Rootes parts in Australia, he may just have what you need.
So now with a radiator I crossed my fingers and went to see how I was going to manage the Radiator hose connections. Well the first setback was that the oil filter just cleared the radiator core, but was hitting against the metal radiator surround and there was no way that a filter change would be possible. So I headed back to Supercheap AutoParts and bought one of the tiny Renault Z608 filters that I mentioned earlier, which fitted perfectly with room to spare.
View attachment 29
The good news was that the front of the water pump pulley shaft cleared by more than I was expecting and the bottom radiator outlet sits lower than the alternator pulley, and there was some space between it and the radiator to run th hose, though the bottom fitting of the radiator will need to be replaced.
At the top it was much the same with enough space to run a hose between the radiator top tank and the front of the rocker cover to connect with the motor. I will be running a push/blow through type 12" thermo fan on the radiator, so the 2.5" space between the oil cooler and radiator will be enough for one of the "slimline" versions that are now available.
Since the photo above was taken, I have unsoldered the top fan cowl and replaced the old inlet pipe with a 90 degree elbow angled toward the Drivers side
That's it for now, weather has been foul here in Sydney with heavy rain, high winds and low temperatures, so haven't been outside or in the shed. Fingers crossed for the weekend
Cheers Stephen
Last edited:
Did something wrong with the pictures, oh well, still learning.
Finally stopped raining last night so was able to get back out to the van tonight.
Here's the picture with the smaller Z608 Renault Oil Filter fitted, so much more room than before! Will plan to change every 5,000km due to it being so small.
Here's the picture of the radiator with the cowl removed and the new top inlet pipe soldered in place.
This top pipe connects to the inlet manifold and needs to do a 180 degree turn to connect. Might see if I can get a bend made up in s/s so I have two straight hoses
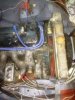
The water inlet to the motor is the one just above the alternator, which needs to eventually run down in front of the alternator pulley. The bottom outlet from the radiator has now been removed and hopefully will have the tight 90 degree bend will be sorted this weekend. The new 12" thermo fan arrived yesterday and fits perfectly between the oil cooler and radiator. Will need to get a 3/8 BSP fitting to solder to the bottom tank to mount the thermo fan control switch then more wiring to plan.
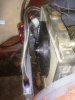
Hopefully this will be enough to keep the 2.4 litre motor cool. Will hopefully know in the coming weeks as the 32/36 DGV Weber should arrive from the USA next week. So with the manifold gaskets fitted I should be able to start her up.
Cheers for now
Stephen
Finally stopped raining last night so was able to get back out to the van tonight.
Here's the picture with the smaller Z608 Renault Oil Filter fitted, so much more room than before! Will plan to change every 5,000km due to it being so small.
Here's the picture of the radiator with the cowl removed and the new top inlet pipe soldered in place.
This top pipe connects to the inlet manifold and needs to do a 180 degree turn to connect. Might see if I can get a bend made up in s/s so I have two straight hoses
The water inlet to the motor is the one just above the alternator, which needs to eventually run down in front of the alternator pulley. The bottom outlet from the radiator has now been removed and hopefully will have the tight 90 degree bend will be sorted this weekend. The new 12" thermo fan arrived yesterday and fits perfectly between the oil cooler and radiator. Will need to get a 3/8 BSP fitting to solder to the bottom tank to mount the thermo fan control switch then more wiring to plan.
Hopefully this will be enough to keep the 2.4 litre motor cool. Will hopefully know in the coming weeks as the 32/36 DGV Weber should arrive from the USA next week. So with the manifold gaskets fitted I should be able to start her up.
Cheers for now
Stephen
Hi All
Been busy and jumping from one thing to the other lately. Have now organised the bottom outlet of the radiator, not a lot of space down there, but worked out, should be enough. Able to use the Nissan bottom hose with the last bend cut off. Hose in picture still needs a little more trimmed off.
Accidently came across a flexible s/s top hose 24" long from a hot rod supplier on ebay, which solves the problem for the top hose. Pretty flash too!
Also managed to get the Thermo fan mounted properly and wired in the relay, though still need to add the temperature control sensor in the radiator. Kit said it was 3/8" BSP, but supplied with 3/8" NPT. Will sort that out soon, just annoying, had the same issue with the Oil pressure and Temp sensors, all 1/8"NPT, Ahhhhhhhhhh!!!!!!!!
My new 32/36 DGV weber also arrived from the USA, so got that mounted on the adaptor and sorted the throttle lever/pulley thing for the accelerator cable and was ready for business. Yes the Weber came out of America, even with freight charge of AU$100 and the purchase price it was about AU$90 cheaper than buying one locally. I've given up trying to make sense of worldwide pricing, if it's a good deal go for it. Yes it is a genuine Weber, not a cheap Chinese copy. Pulled it apart to note the jet sizes and set the float level, which was way out. This is pretty normal, incorrect float level is often the reason DGV's don't run well. People just bolt them on expecting everything to be ready to go. They're not, its always the first thing to check on any carb. Had to get a magnifying glass to see the jet numbers, even with my glasses on. I'm sure there were bigger and clearer to read 20 years ago!
With the carb and manifold fitted with a home made manifold gasket, I decided it would be good to see if the motor actually worked. It had been sitting around for 3 years and I'd never had it running. When I bought it I got the usual comment from the seller "it was running fine when we removed it". Fortunately for me, my sister knew the seller. She used to kennel her dogs with him when she was away from home and said he was an honest country guy. I also wanted to see if the wiring was correct prior to shortening the longer wires and getting them "plumbed in". So with the spare battery in place and hooked up, spark plugs and leads connected, a temporary fuel supply and my trusty can of "Start Ya Bastard" I turned the key. Well, underwhelmed best sums it up. It's an old battery, but cranked the motor well without the sparkplugs, very different story when it had to crank against full compression. Now too late in the day to buy one, my jumper leads too short and getting dark , I conceded.
A couple of days later I had finally got hold of a new battery and the motor came to life after a bit of cranking. Relieved that it actually worked , I now wondered what that funny whistling noise was and where it was coming from. I only ran the motor for short bursts as the cooling system isn't complete, however the oil cooler is and was able to confirm there weren't any leaks there. I final found the whistle, it was a small 3/16" hole left over from where I had remove something Nissan found necessary for pollution control. There seemed to be another air leak under the carb around the carb/manifold flange. I could stop it with my finger but couldn't see it, so off came the manifold and carb. I couldn't see anything under the manifold when removed so thought there might be a crack in the thick heat insulating block between the manifold and adaptor, so removed the carb to check. Talk about a dummy! I had left one star washer on one of the mounting studs and sandwiched it between the adaptor and carb. With that removed and the other hole tapped and plugged I refitted the manifold and carb and tried again. The whistles had gone, though the motor had now developed a hesitant miss at idle and though less noticeable with some revs was still there. In general a good result, considering the electrical system also charged and did what it should for the motor.
So back to it tomorrow, to get some more of the bits finalised. Will try and get some footage of the motor starting and running. I didn't mention before sound good too.
Cheers Stephen
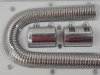
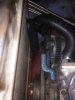
Been busy and jumping from one thing to the other lately. Have now organised the bottom outlet of the radiator, not a lot of space down there, but worked out, should be enough. Able to use the Nissan bottom hose with the last bend cut off. Hose in picture still needs a little more trimmed off.
Accidently came across a flexible s/s top hose 24" long from a hot rod supplier on ebay, which solves the problem for the top hose. Pretty flash too!
Also managed to get the Thermo fan mounted properly and wired in the relay, though still need to add the temperature control sensor in the radiator. Kit said it was 3/8" BSP, but supplied with 3/8" NPT. Will sort that out soon, just annoying, had the same issue with the Oil pressure and Temp sensors, all 1/8"NPT, Ahhhhhhhhhh!!!!!!!!
My new 32/36 DGV weber also arrived from the USA, so got that mounted on the adaptor and sorted the throttle lever/pulley thing for the accelerator cable and was ready for business. Yes the Weber came out of America, even with freight charge of AU$100 and the purchase price it was about AU$90 cheaper than buying one locally. I've given up trying to make sense of worldwide pricing, if it's a good deal go for it. Yes it is a genuine Weber, not a cheap Chinese copy. Pulled it apart to note the jet sizes and set the float level, which was way out. This is pretty normal, incorrect float level is often the reason DGV's don't run well. People just bolt them on expecting everything to be ready to go. They're not, its always the first thing to check on any carb. Had to get a magnifying glass to see the jet numbers, even with my glasses on. I'm sure there were bigger and clearer to read 20 years ago!
With the carb and manifold fitted with a home made manifold gasket, I decided it would be good to see if the motor actually worked. It had been sitting around for 3 years and I'd never had it running. When I bought it I got the usual comment from the seller "it was running fine when we removed it". Fortunately for me, my sister knew the seller. She used to kennel her dogs with him when she was away from home and said he was an honest country guy. I also wanted to see if the wiring was correct prior to shortening the longer wires and getting them "plumbed in". So with the spare battery in place and hooked up, spark plugs and leads connected, a temporary fuel supply and my trusty can of "Start Ya Bastard" I turned the key. Well, underwhelmed best sums it up. It's an old battery, but cranked the motor well without the sparkplugs, very different story when it had to crank against full compression. Now too late in the day to buy one, my jumper leads too short and getting dark , I conceded.
A couple of days later I had finally got hold of a new battery and the motor came to life after a bit of cranking. Relieved that it actually worked , I now wondered what that funny whistling noise was and where it was coming from. I only ran the motor for short bursts as the cooling system isn't complete, however the oil cooler is and was able to confirm there weren't any leaks there. I final found the whistle, it was a small 3/16" hole left over from where I had remove something Nissan found necessary for pollution control. There seemed to be another air leak under the carb around the carb/manifold flange. I could stop it with my finger but couldn't see it, so off came the manifold and carb. I couldn't see anything under the manifold when removed so thought there might be a crack in the thick heat insulating block between the manifold and adaptor, so removed the carb to check. Talk about a dummy! I had left one star washer on one of the mounting studs and sandwiched it between the adaptor and carb. With that removed and the other hole tapped and plugged I refitted the manifold and carb and tried again. The whistles had gone, though the motor had now developed a hesitant miss at idle and though less noticeable with some revs was still there. In general a good result, considering the electrical system also charged and did what it should for the motor.
So back to it tomorrow, to get some more of the bits finalised. Will try and get some footage of the motor starting and running. I didn't mention before sound good too.
Cheers Stephen
Last edited:

It lives!!
Congrats!!