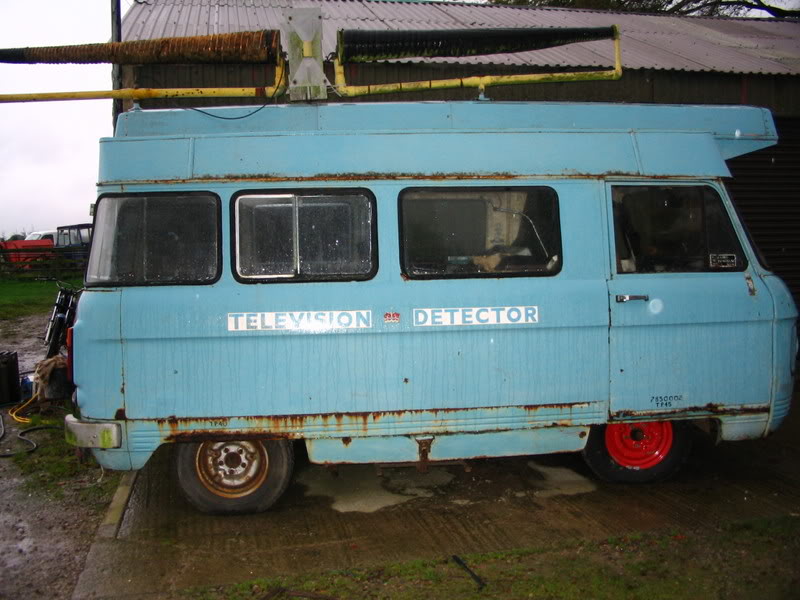
The New Project

How are going with the radiator i found one today that i think came from a Rapier i measured it then came home and remeasured mine
it fits perfectly typical Rootes cars using parts from all there range.
I know a guy in Brizzy who is a rootes dealer for $30 bucks its yours.
I also have a new old stock front screen if your interested.


Such is Life

e754d6ee-8a0d-477f-8642-4a3bfbd24b90_zpsd0b5718d.jpg
 
Radiator sounds interesting, would be handy to use for starters and the price sounds good. Will eventually go for an Aluminium version to suit Escort RS Mk1/2, supposed to cope with up to 250hp, which should easily cope with my 2.4 litres in a small engine bay with air conditioning. Do you remember which sides the inlet and outlet were on?

My windscreen is good, though only toughened glass. What I do need is the glass for both rear doors. If you still have yours out, can you let me know how thick it is. I've made some 3mm Perspex templates in case I need to get some cut to size in glass. Don't expect O'Brien's to have the dimensions, let alone know what a Commer is!

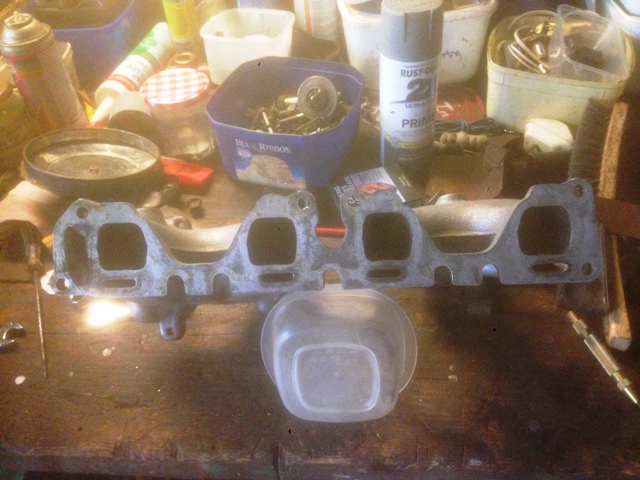
Spent some time this afternoon modifying the ports in the inlet manifold. These are the ports on the Z24 manifold that came with my motor

2015113133047_006.JPG


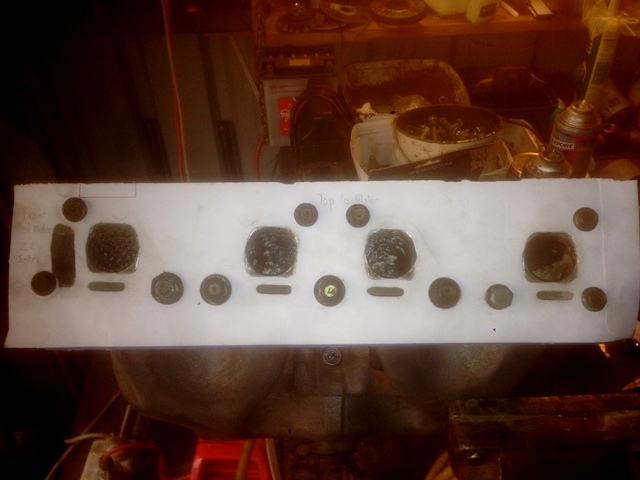
For some unknown reason Nissan decided to use round ports on the smaller Z20 motor that I got the low slung manifold from. Made a cardboard template as a guide for opening up the corners to suit my Z24. Everything else is identical.
201511313392_004.JPG


The adaptor for the DGV Weber arrived today and should be ordering the Weber in the next week or two (waiting for a quarterly bonus to come through shortly) so finishing that off the manifold is my plan for the rest of the week.

Cheers Stephen
 
With the original radiator and mounts you can get it recored to take the HP and air con while still using the original setup .
I'll measure the glass later in the week when i get home.
The top outlet on the radiator is on the passenger side and the bottom one is on the drivers side both are curved towards the
middle and pipe size is about 30mm

Such is Life

e754d6ee-8a0d-477f-8642-4a3bfbd24b90_zpsd0b5718d.jpg
 
Thanks for the glass thickness, will speak with O'Brien's, they have an outlet only a few miles from home. Will be interesting what response I get. Thinking of getting them cut from flat laminated glass, has to be the easiest way to go.

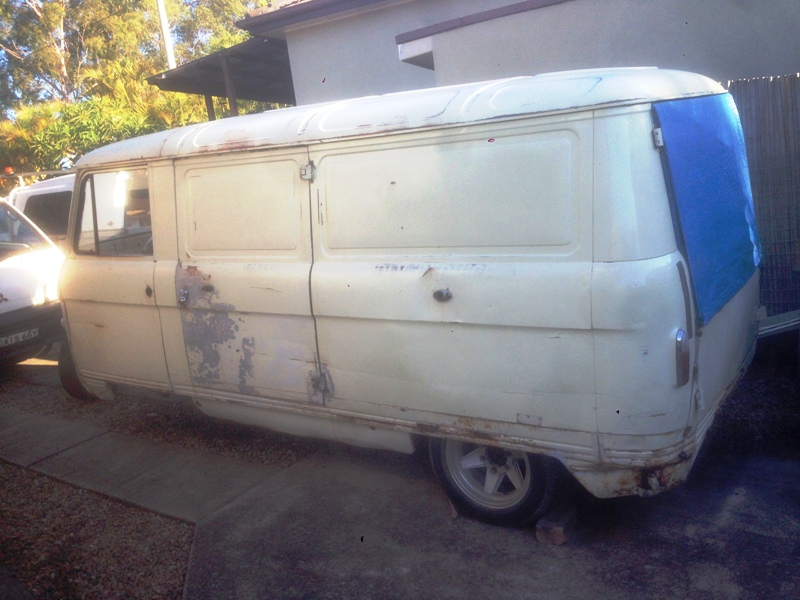
What rear corner glass, mine's a "blind side" delivery van. A windscreen at the front and windows in the front and rear doors.

2015115122130_IMG_1549.JPG


Cheers Stephen
 
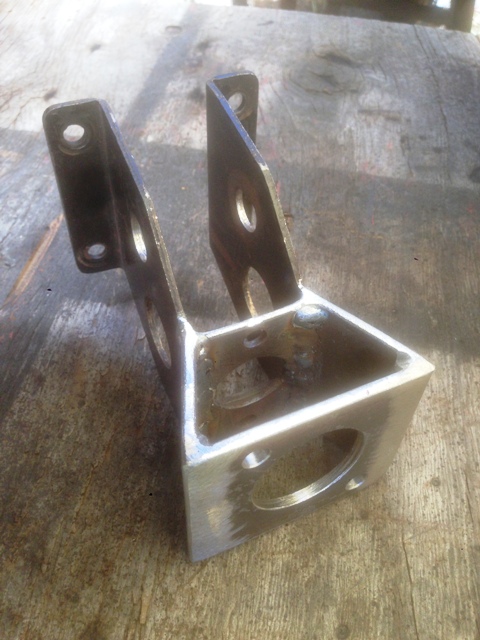
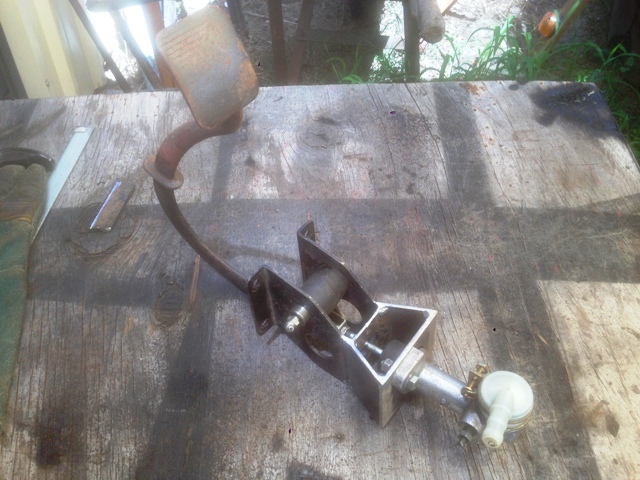
Hi All, another update. Got on to the clutch master cylinder today, replacing the original with the Nissan unit that matches the slave on the gearbox. As usual some adaptation was required as bolt pattern was different and the overall length around 2" longer. Cut up some of the steel left over from the engine mounts and job done.

2015117131410_001.JPG


Bolted on the cylinder and the pedal sits just about right.

2015117132127_002.JPG


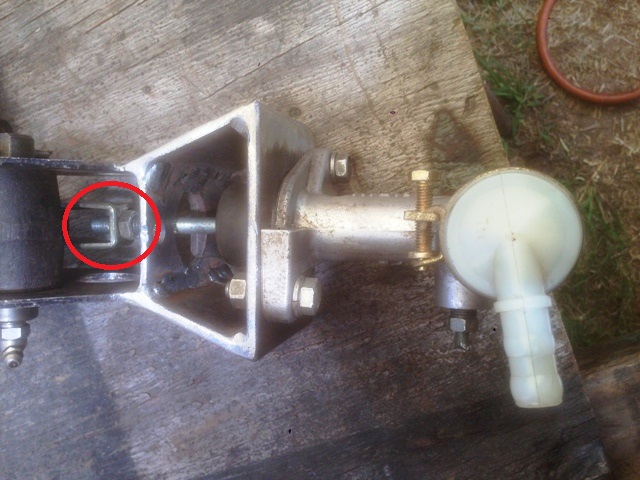
The adjustment on the piston fork should give me about 1" up or down adjustment for fine tuning further down the track.

2015117132235_004.JPG


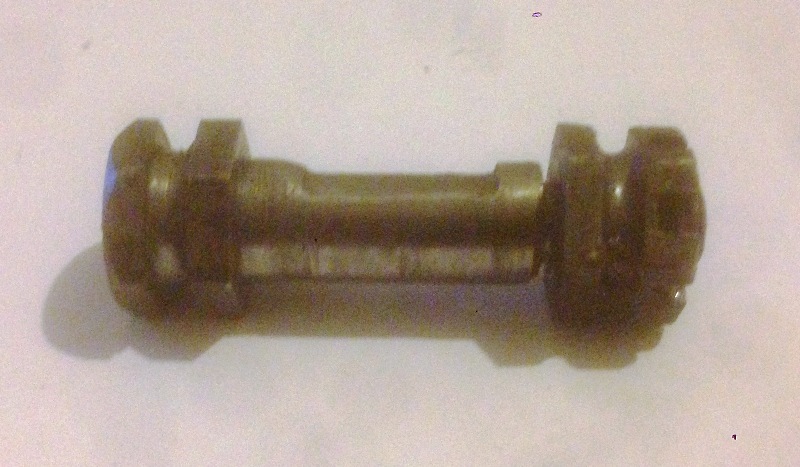
The pivot pin is quiet badly worn, fortunately the hole on the pedal arm isn't too bad. The pivot bolt will need replacing as I remembered I need to use these as the return springs hook on to them to assist in the pedal returning to its normal position.

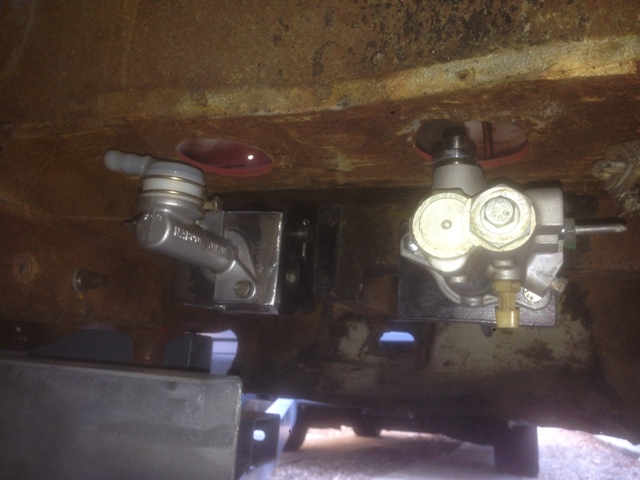
With that done I fitted both the clutch and brake arrangements into the van to have a think about where to fit the fluid reservoir/s and plan where to run the hydraulic lines.

2015117133312_008.JPG


My preference is to have the reservoirs in the engine bay. Will need to go for another wander at the wreckers and see if I can find a combined twin/split brake and clutch remote reservoir to do the job.

Can I have some feed back regarding replacement brake lines, more so the use of copper alloy tubing verses metal bundy tube. Have never used the copper alloy and know that flaring the metal bundy tube can be a pain. Keen for some first hand experiences, or links on the forum to jobs you have done previously, thanks.

After fitting up both pedal arrangements I decided to remove the original throttle linkage set up as the carb is on the driver's side of the motor and will be running a cable direct from the peddle to the carb. If ever I have seen something so massively over engineered it has to be that throttle linkage, bloody rods, levers, shafts that split into two parts, what an overkill! I bet the guys at the factory assembling these when new must have had the most "colourful language" on the production line. Wouldn't be surprised if it was one of those guys that invented the modern "fly by wire" throttles some modern cars have.

It seems that most of the electrical needs to be swapped over in the engine bay as most of the motor accessories appear to be on the opposite side to the Commers, so a few things to investigate there. Thankfully there aren't too many wires in a Commer Engine bay to worry about.

Cheers Stephen
 
Nice piece of fabbing there [8D]
Pure copper isn't a good idea as the point where you flare the end is work hardened during the process and it can eventually fail if it's subject to vibration. Annealing the copper pipe after flaring can help but Kunifer (cupro-nickel) is the ideal material for brake lines.

41fa30c8-22ce-43e8-bd12-188475a80292.jpg
 
I agree that Kunifer is the material of choice for brake pipes. I wouldn't use anything else. Many years ago I really struggled trying to replace the Karrier Bantam pipes with original steel type. They just wouldn't seal properly.

Commer PB Jennings
 
Thanks, yes it's the copper-nickel alloy version that I am looking at. Checked on Oz eBay and there seems to be no one selling in Australia, all the sellers appear to be UK, some USA and China(no thanks). I read an article on line saying that Volvo has been using the copper-nickel for many years, so I think this will be the way to go.

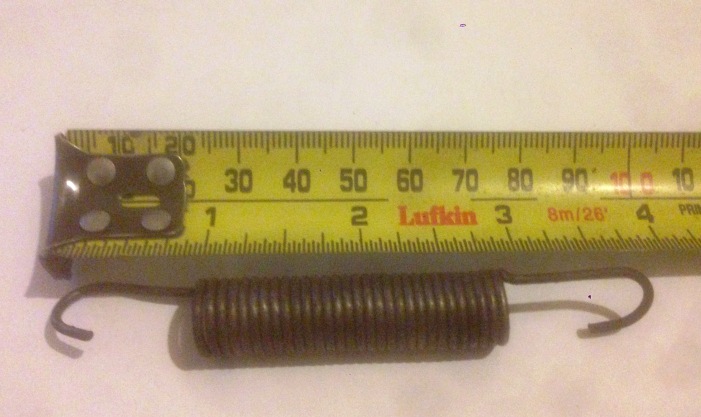
While I'm here, those return springs on the brake and clutch pedals, are they still available? Two of mine are broken and the others 50 years old, so would like to replace them if available

Cheers Stephen
 
Are the springs a coil with a loop on either end, or a circular one with a washer, that fits over the piston shaft[?]

www.commervanspares.co.uk
https://www.facebook.com/commervanspares
 
Hi Martin, coil with loop each end as in the picture below, this is now the only one I have as the end broke off the other that was still hanging under the van when I went to remove it today.

2015118135433_002.JPG


Do you have the piston/fork bolt and nuts as well? This is a picture of my good one.

2015118135648_006.JPG


Cheers Stephen
 
Been having a look at other aspects of the van and what needs to be done. Removed the complete front wiring loom the other day and have it now laid out on a board so I can figure out what changes need to be done due to motor accessories, like starter, distributor and alternator being in different places than the Commer's. I had though if hi-jacking the loom form something more modern, but after a wander around the wreckers checking them out I think it will be easier to use the original and modify it to what I need. On checking the fuzzy copy of the wiring diagram in the Commer Manual, I noticed it was for a van fitted with an alternator. Handy for what I need, however My van was fitted with a generator and not sure how this changes the loom, any hints or tips?

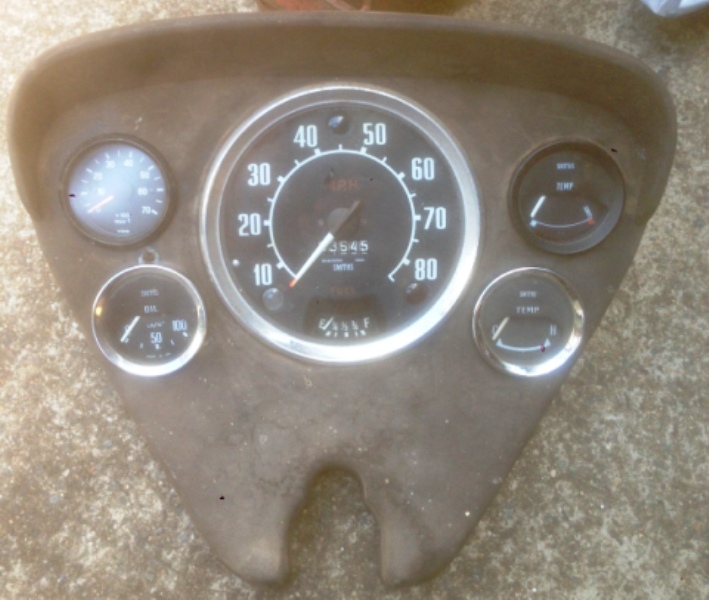
The dash/instrument pod on my van differs slightly from original as the combo ignition/light switch is long gone and had a tin plate across the hole with what looks to be an old Mini ignition. I have a key that when you wiggle it enough will make it work and seems to be a basic on/off switch. A separate two position headlight switch sticks out the opposite side to the wiper switch. So I have decided to relocate the ignition switch and add another pair of gauges to the pod
2015125145317_003.JPG


With the ignition switch not on the dash, I figured there was enough space and made the two additional holes for some additional gauges.

2015125142446_003.JPG


Top left is a VDO 50mm Tacho that I kept from my old Range Rover, used to pod mounted on the dash. It was originally designed only for use with 4 cylinder engines only, but was easily modified at the time by a specialist, to suit the V8. I will have it converted back to 4 cylinder eventually. It's an old friend and travelled many miles with me over the years in the Range Rover and will be a welcome addition to the Commer.

Below this will be the oil pressure gauge, with the other side having the water and oil temperature gauges. I will eventually replace those in the picture with VDO gauges to do the job. As much as I would like to use the Smiths gauges of the time, I have always found their lighting at night varies gauge to gauge and prefer to have numbers not just C and H on temperature gauges.

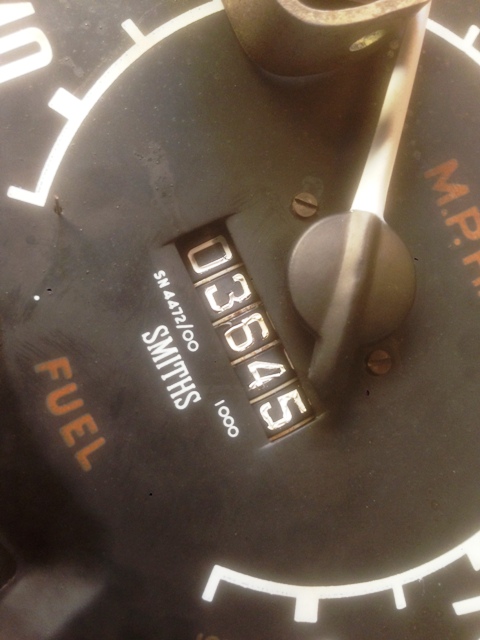
While at it I removed the speedo. The numbers are pealing off the odometer from sitting for so long in the one position. This picture was taken once I had removed the bezel and glass for a better look.
201512514233_006.JPG


I have a feeling that it my have been around the clock once or twice[:0]. While looking into this I discovered the speedo was seized and while freeing it up managed to strip the small pinion gear that drives the odometer. Luckily I had an old Smiths Triumph speedo and stripped that for parts. The gear is the same and now replaced and all works well, discovering my drill does the equivalent of 50 mph. Planning tomorrow the more delicate exercise of replacing the odometer number wheels with the ones from the Triumph speedo, fingers crossed they are the same.

Cheers Stephen
 
Sound like your going through the same issues i am with the wiring but my sons mate is an auto sparky and is coming around tomorrow
arvo to point me in the right direction,i'll let you know how it went.
How easy or hard would it be to change it to KPH instead of MPH

Such is Life

e754d6ee-8a0d-477f-8642-4a3bfbd24b90_zpsd0b5718d.jpg
 
Have thought about that, but going to stay in MPH as my Triumph's are also MPH. I grew up on the change over to metric so was always doing conversions for my parents at the time. I still think in Miles per Gallon and with the country travel I used to do, it was easier to work out an ETA averaging 60MPH, being a mile a minute, though up in North Queensland you would easily average 120KPH all day, so switched into metric mode, which was 10 KM in 5 minutes

The easiest way I can imagine changing to KPH would be take a picture of the speedo Photoshop it, print it and stick it over the existing face, a friend did this once on a VW Bettle he was doing up. I have seen the occasional Speedo on UK EBay with scales in MPH and KPH. I remember there used to be little step up gearboxes you could fit to the speedo drive, probably long gone, fine with a 120 MPH speedo but with ours once you pass what would become 80KPH you would be guessing.

I do recall having a conversation years ago with the guy who converted my VDO tacho for 4 to 8 cylinders. The speedo in my rally car was way out because of the low ratio diff and the gearbox from a car that ran 14" wheels, not the 13" that I had. He could recalibrate the speedo error if did some measurements like wheel diameter and distance covered in 10 rotations. Never bothered in that case, but we both may need to consider this due to the diff ratio changes and speedo drives on gearboxes totally unrelated to the speedo. Unfortunately that business closed up many years ago, but surely there will be others that can do the same.

I could have taken a picture of my speedo, but put it back together today. I chickened out in changing the odometer number drums. Came to the conclusion that if I made a mistake, broke or lost something I wasn't going to get another one too easily.

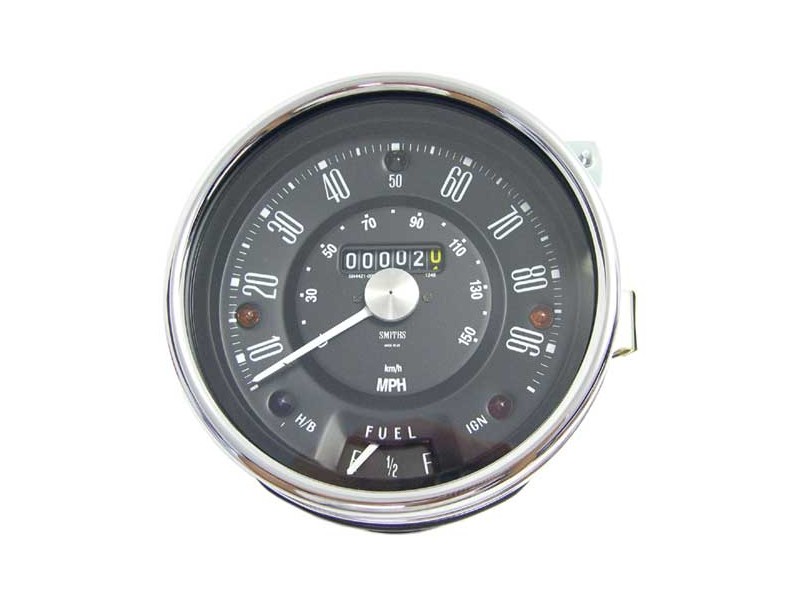
Just had a thought, Mini speedo's they were large diameter like ours and had the fuel gauge at the bottom. Had a quick search and found this. Ouch $350 for a brand new one!! No measurements given, suspect they are not quite as big as ours
2015126132250_Mini speedo 90 mph.jpg


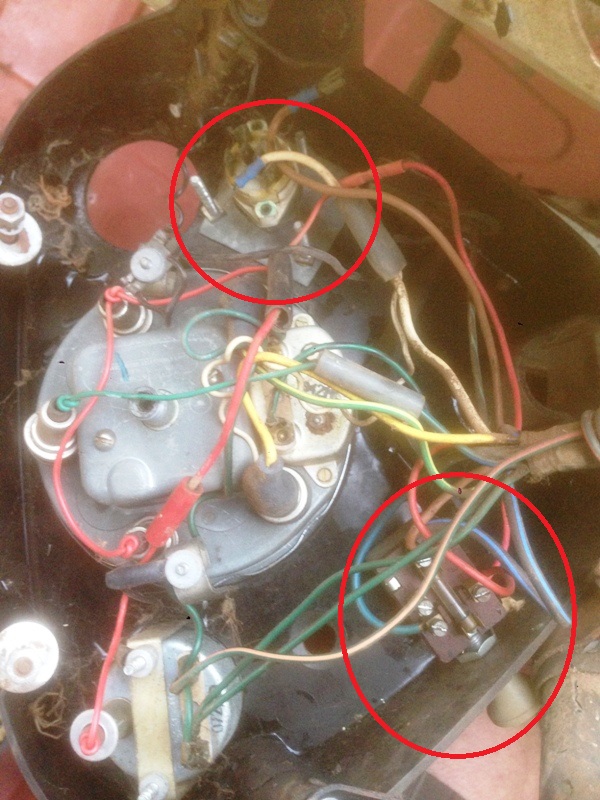
Getting back to the electrics, I noticed my van has no voltage stabiliser that I have found so far, I think they are usually mounted on the back of the speedo and definitely nothing in the front loom I have removed. Wondering if this is because it had a generator and what effect an alternator will have on the original fuel gauge(the VDO gauges don't need one). Also while the speedo was apart realised the was no hi-beam or hand brake warning lights. Another thing that doesn't seem to exist is any cable or wire to the gearbox for reversing lights.

Fun fun fun. Checking out gauges on Ebay last night I found a VDO oil pressure gauge, which has a built in warning light. Both the gauge and light working off the same sender unit, designed for hot rods or where space or looks are an issue. I will be using this, so it will free up the original Oil warning light for something else.

Let me know what your sparky thinks if he doesn't run off screaming first.

Cheers Stephen

 
Interesting stuff:)
The voltage stabiliser should be mounted just under and to the left of the instrument cluster at the bottom of the dash support panel.

41fa30c8-22ce-43e8-bd12-188475a80292.jpg
 
Man your on top of it, my sparky forgot with being first day back at school he was in charge of drop off and pick up today, tomorrow is another day.
My Rootes man rang today and said he found the original commer radiator so its available if you need it.
the speedo on my oxford traveller is mph but it runs 10 mph slow at 60 i was wondering why the traffic was zooming by i was doing 60
but i was only doing 50 thought i was going great guns , majorly deflated.
I think i'll have the same issue now due to the diff ratio change from 5.56:1 to 4.55:1 and the gear box change but still have the 15" wheels.

Such is Life

e754d6ee-8a0d-477f-8642-4a3bfbd24b90_zpsd0b5718d.jpg
 
The radiator sounds good and would be a nice change to have something that bolts in the van with out modifications. Let me know how to get in contact.

Don't fret about the Speedo error on the Oxford. On a recent trip travelling in 2 cars my friend kept complaining that I was speeding in my L300. I know this isn't true as I have checked the speedo against a "measured 5km" on the Hume highway on the way out of Sydney, mine actually reads about 2-3 KPH under. So while I buzzed along at 100, the speedo in her 2013 Nissan XTrail was showing a touch over 110KPH. With modern speedos being electric, I can see no excuse for that amount of error.

Was having a look around on Google and found this searching for "mechanical speedometer calibration", there is hope. http://www.hotrodhotline.com/calibrating-speedometer

Will be looking into it more to see where the specialists are.

Cheers Stephen
 
You can contact him : John Harris Brisbane 07-33415555 just mention me Frank and the radiator he has all sorts of Rootes based
parts a veritable treasure trove.

Such is Life

e754d6ee-8a0d-477f-8642-4a3bfbd24b90_zpsd0b5718d.jpg
 
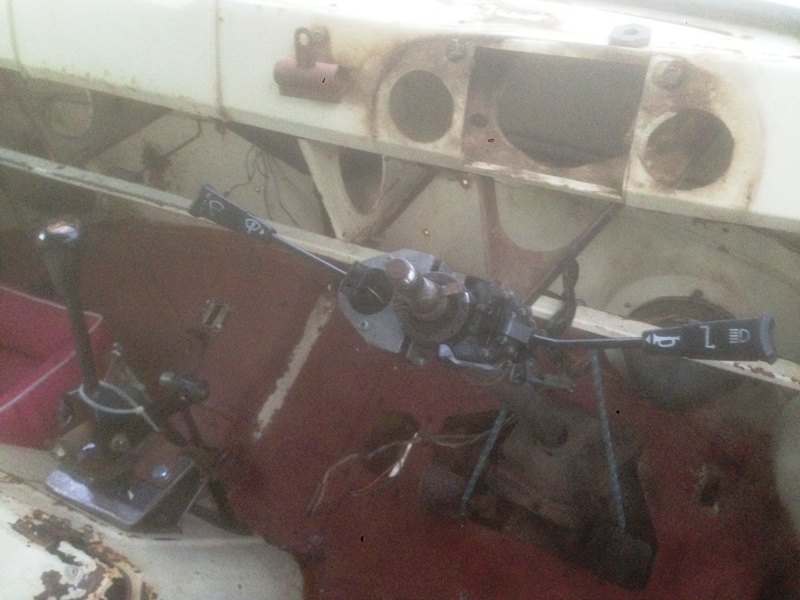
Thanks will do as my quarterly bonus comes through tonight. Still pondering the electrics of the van. I have a spare Triumph Mk 2 2.5 PI out the back and going to pull the front loom out of that and see if this is something I can use. No harm in trying as it's free. While in the process of starting to remove it I disconnected the steering column indicator and wiper stalks from the Triumph and wondered if they fit the Commer. Well with a little fiddling this was the result.

201512813411_001.JPG


Not sure yet how they will fit with the dash pod in place as I had spray painted it about half an hour earlier. Could be interesting set-up with the addition of the rotary headlight switch to the side of the dash pod and the ignition switch underneath. Of coarse they plug straight into the Triumph loom which also has much of the additional wiring in place for dash warning lights, suits an alternator and includes a voltage stabiliser, so hoping this might simplify things, if that's ever possible.

Cheers Stephen
 
Back
Top