
You are using an out of date browser. It may not display this or other websites correctly.
You should upgrade or use an alternative browser.
You should upgrade or use an alternative browser.
Meet Ted
- Thread starter Panky
- Start date


I fitted one of the intermittent wiper robots to Ted a couple of weeks ago, it worked but there is a bit of a strange thing going on. The wipers flick away intermittently as they should but when the indicators are switched on it seems to interfere with the timing of the wipers - every time the indicators flash the wipers try to sweep :I. This also happens occasionally when the fuel pump clicks. All I can think of is that there is interference as the other equipment operates that causes the relay on the new board to kick in, I wired the feed to the fuse board but if it's connected direct to the battery the intermittent system works better:I. We went out in Ted today and had the first real chance to test it properly but the system was a bit more intermittent than it should be  The lowest timed sweep should be five seconds but there was hardly any gap between it kicking in and on the longer times the wipers were stopping half way across the screen then completing the sweep on the next click of the timer. Something had to be done. I salvaged a capacitor from an old computer power supply it was a 50v component as compared with a 25v one supplied with the robot kit so should be more reliable. So stripped the PCB out from behind the dash and replaced the capacitor - it was awful [xx(]( The wipers were stuttering as the relay on the board clicked away erratically and the system became unusable (faulty salvaged component maybe). So I pinched the capacitor out of another kit that's waiting to be fitted to Harvey and fitted that - result Although there is still interference if The live feed is taken from the fuse board the robot does it's stuff perfectly if taken from a permanent live feed taken off the voltage regulator. That'll do for now

Member of the Non-Facebook Club
The lowest timed sweep should be five seconds but there was hardly any gap between it kicking in and on the longer times the wipers were stopping half way across the screen then completing the sweep on the next click of the timer. Something had to be done. I salvaged a capacitor from an old computer power supply it was a 50v component as compared with a 25v one supplied with the robot kit so should be more reliable. So stripped the PCB out from behind the dash and replaced the capacitor - it was awful [xx(]( The wipers were stuttering as the relay on the board clicked away erratically and the system became unusable (faulty salvaged component maybe). So I pinched the capacitor out of another kit that's waiting to be fitted to Harvey and fitted that - result Although there is still interference if The live feed is taken from the fuse board the robot does it's stuff perfectly if taken from a permanent live feed taken off the voltage regulator. That'll do for now
Member of the Non-Facebook Club
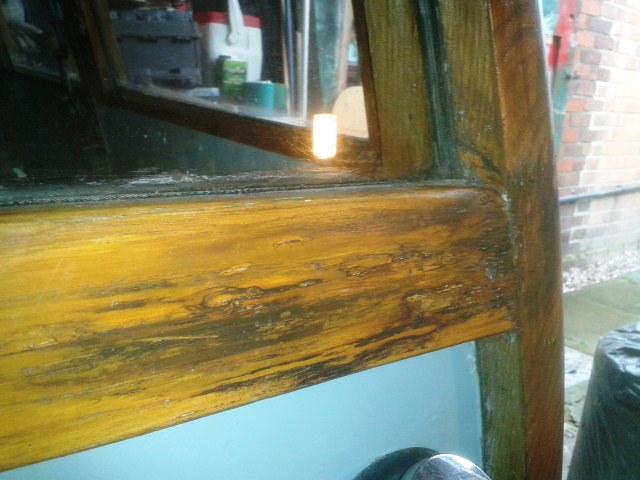
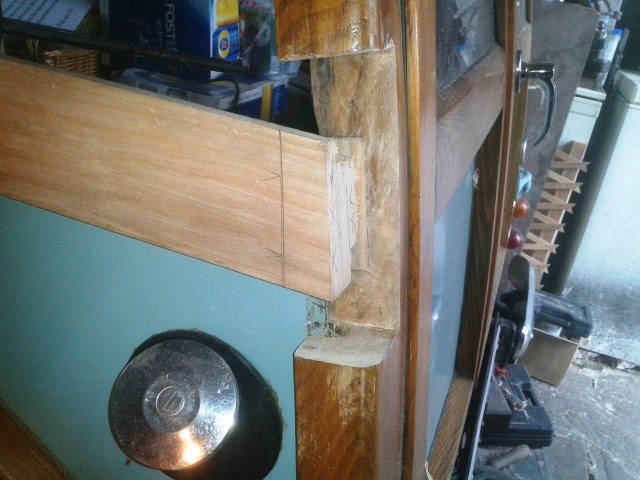
A little bit of staining on Ted's timber has spread a little[V]
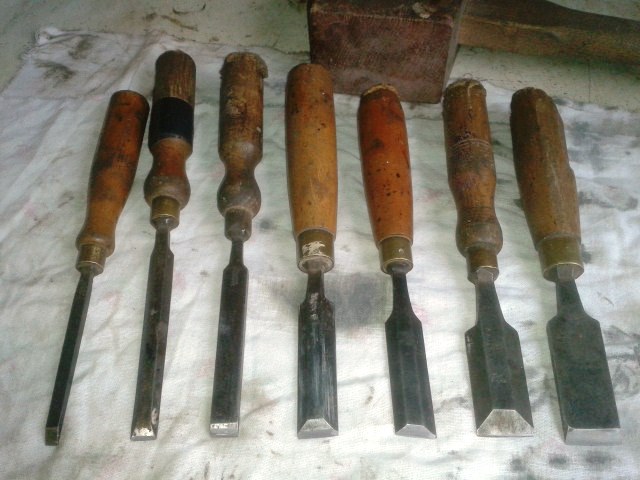
As I don't have any wood welding rods these got dusted off and sharpened Where do you plug them in
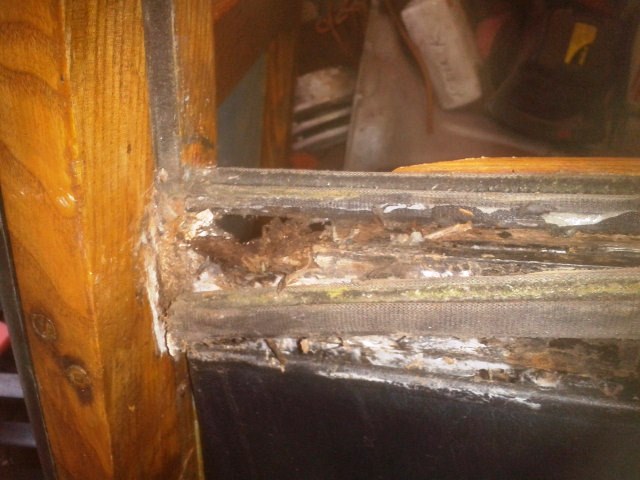
A bit of poking around.........
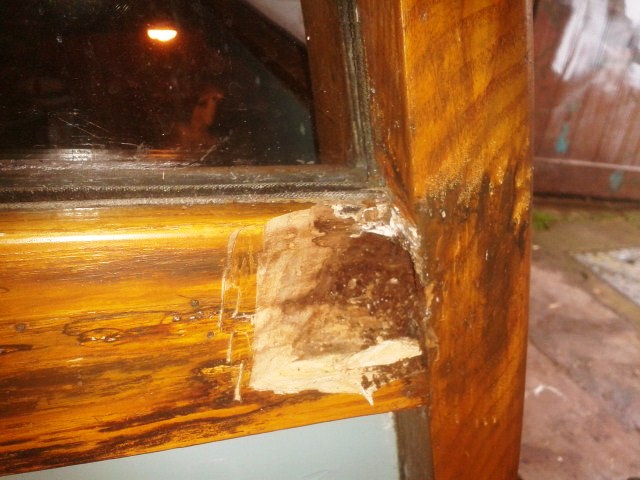
....developed a bit:I
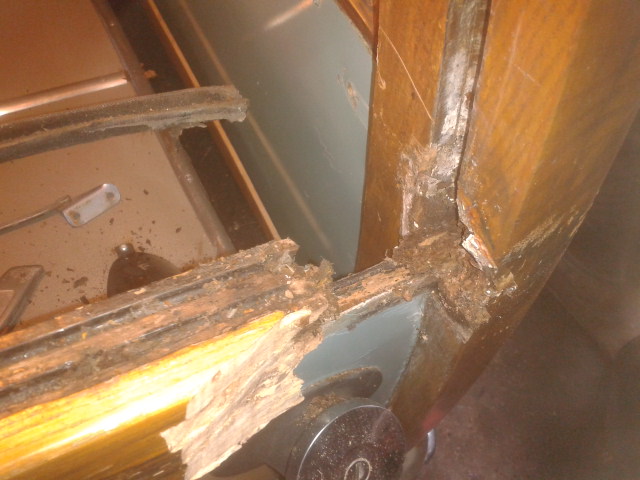
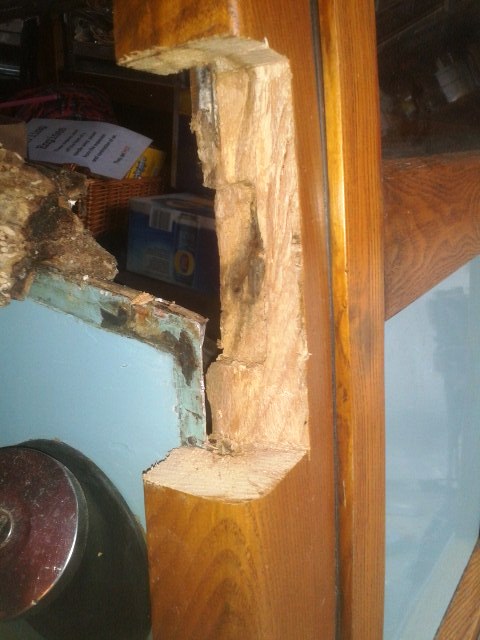


A little bit more than I anticipated but luckily I've got a piece of ash big enough to do the job. All the cut ends have been given a couple of applications of Cuprinol and tomorrow I'll knock up the repair pieces
As I don't have any wood welding rods these got dusted off and sharpened
Where do you plug them in
A bit of poking around.........
....developed a bit:I
A little bit more than I anticipated but luckily I've got a piece of ash big enough to do the job. All the cut ends have been given a couple of applications of Cuprinol and tomorrow I'll knock up the repair pieces
I have some wood welding rods, I will bring them to martins for you Looks better with the rot cut out back to solid wood
Looks better with the rot cut out back to solid woodWhat sort of joint are you going to use?
what sort of weld are you going to use?

'I intend to live forever - so far, so good'
what sort of weld are you going to use?
'I intend to live forever - so far, so good'
bit of filler it that, come up lovely
The Blue Toaster

The Blue Toaster
quote:
Originally posted by renaultvation
What sort of joint are you going to use?
what sort of weld are you going to use?
'I intend to live forever - so far, so good'
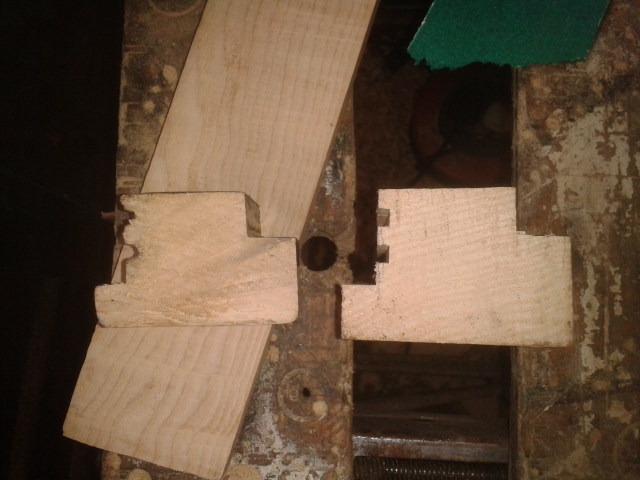
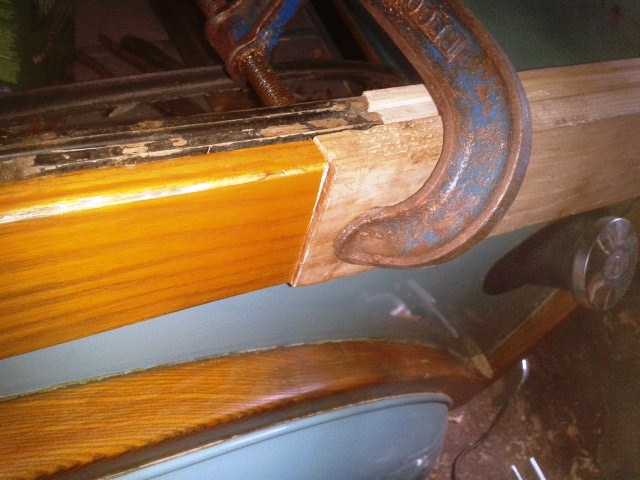
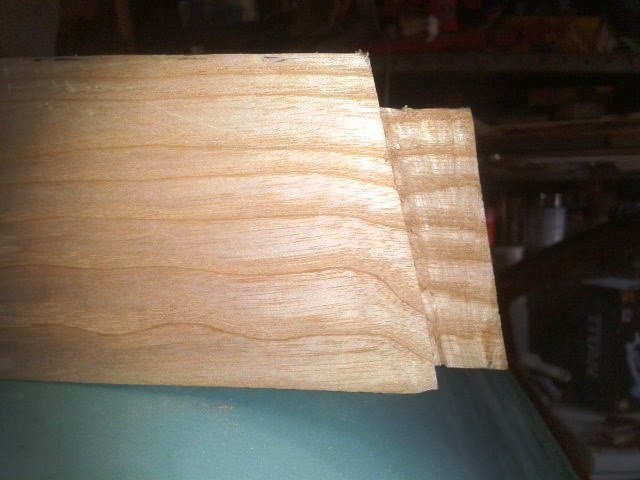
The rail joint will be scarfed and I'll re-create the tennon on the rear pillar, been doing some of the preparation today
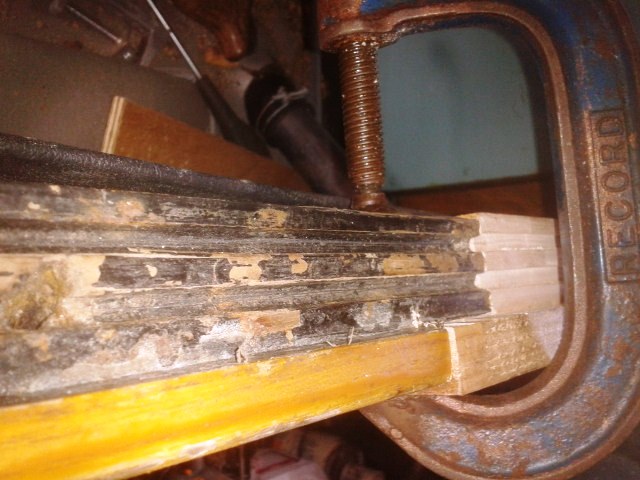
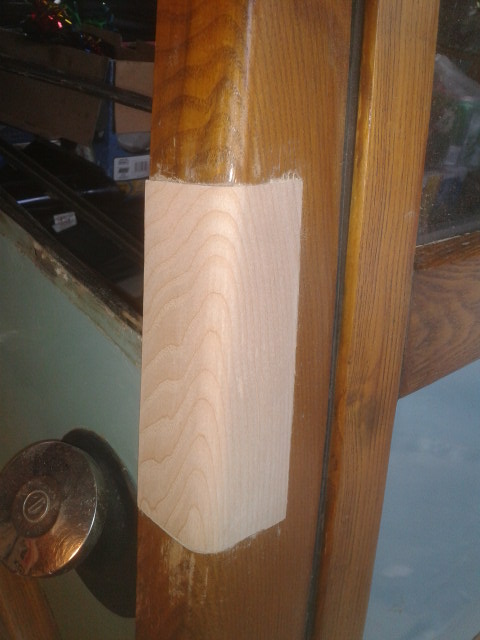
The waist rail molding is a bit more complicated than I could manage with me chisels so I've joined the router club, first time I've used one and it turned out quite well[^]
The original section is on the right, with a bit of planing down the new piece should be fine.
First bit of new wood glued in
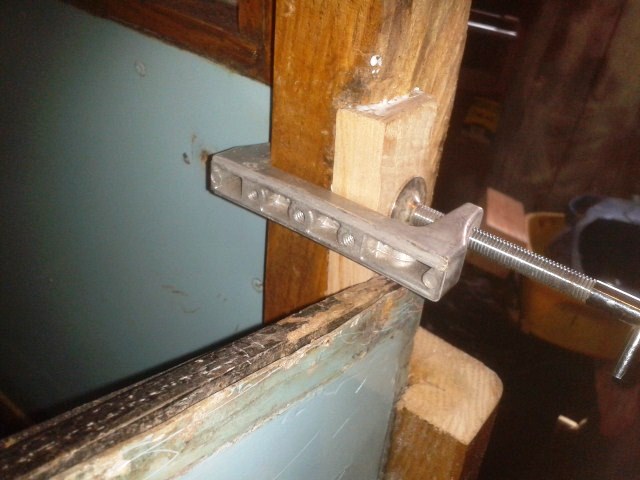
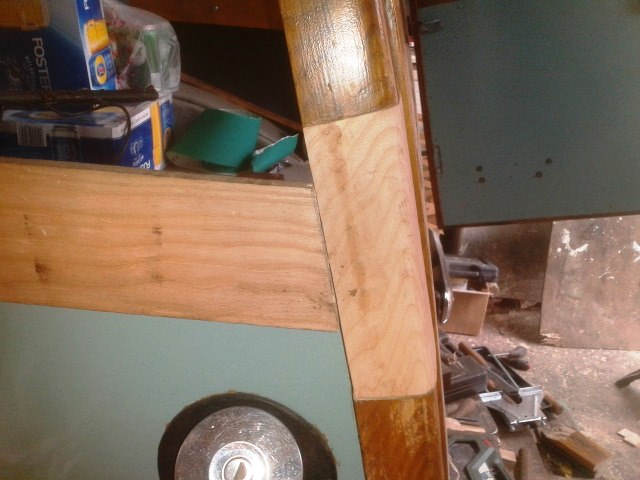
Trimmed off and the rear pillar repair temporarily in place
Sloshed a load more Cuprinol on the new wood, tomorrow should see it all together and shaped
Originally posted by renaultvation
What sort of joint are you going to use?
what sort of weld are you going to use?
'I intend to live forever - so far, so good'
The rail joint will be scarfed and I'll re-create the tennon on the rear pillar, been doing some of the preparation today
The waist rail molding is a bit more complicated than I could manage with me chisels so I've joined the router club, first time I've used one and it turned out quite well[^]
The original section is on the right, with a bit of planing down the new piece should be fine.
First bit of new wood glued in
Trimmed off and the rear pillar repair temporarily in place
Sloshed a load more Cuprinol on the new wood, tomorrow should see it all together and shaped

Panky panky panky, perfection..you've even lined up the grain!!!
The Blue Toaster
The Blue Toaster
That is a cracking good job you're doing there Panky. I too, noticed that you had lined up the grain. Did you have much ash to select an appropriate section, or was it just good fortune?
'I intend to live forever - so far, so good'
'I intend to live forever - so far, so good'
Nice repair Panky, a few coats of varnish and it will be splendid

"You,re only supposed to blow the bloody SLIDING doors off"
Founder of the 6 speed club
"You,re only supposed to blow the bloody SLIDING doors off"
Founder of the 6 speed club
Didn't quite get as far as I'd hoped today as all the joints need to be treated with Cuprinol before final gluing and assembly and it needs to dry overnight but here's where I got to.
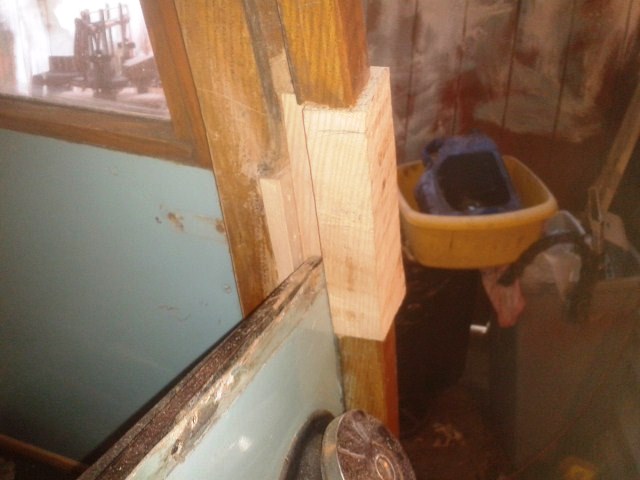
Roughly shaped the pillar repair section, it's held in with screws from the inside so I can remove it knowing it will go back in the same place.
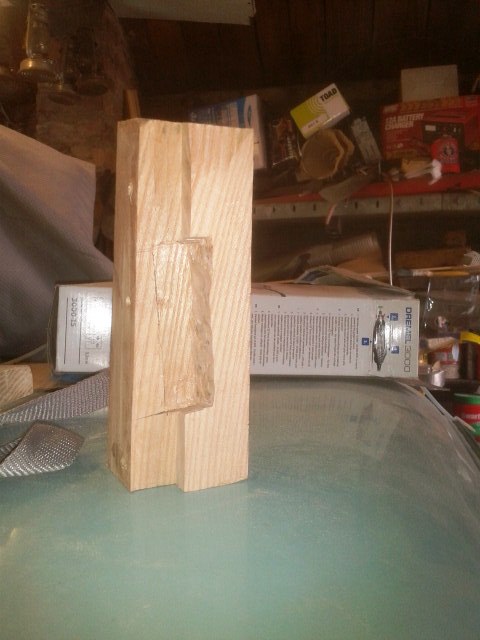
I made a template off the other pillar to get the position of the tennon.
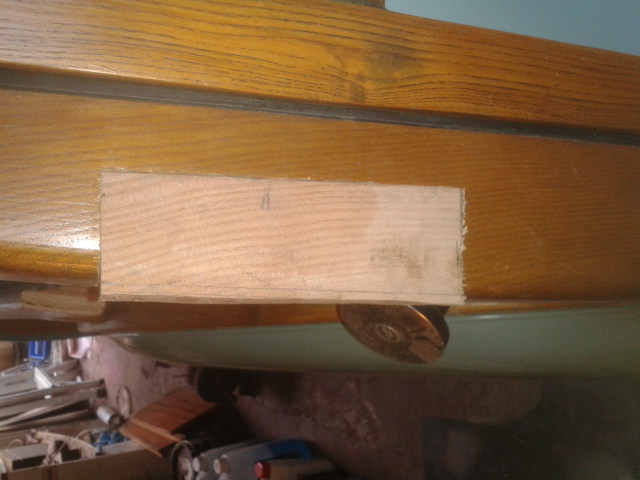
A bit of sawing and chiselling later
Tomorrow it's time to get sticky
Roughly shaped the pillar repair section, it's held in with screws from the inside so I can remove it knowing it will go back in the same place.
I made a template off the other pillar to get the position of the tennon.
A bit of sawing and chiselling later
Tomorrow it's time to get sticky