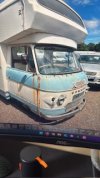
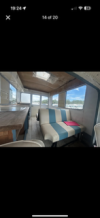
Betty the Commer Pizza Truck Project.

Leerec

Active Member
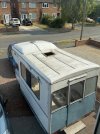
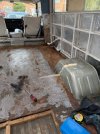
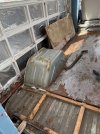
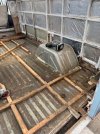
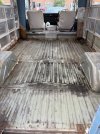
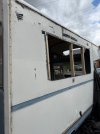
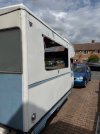
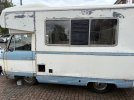
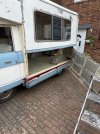
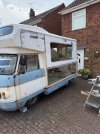
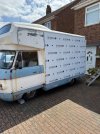
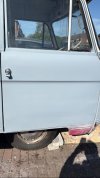
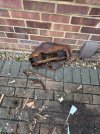
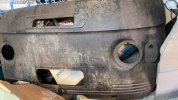
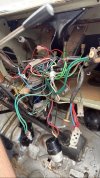
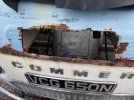
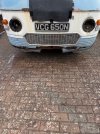
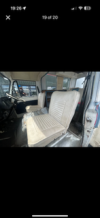
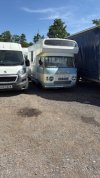
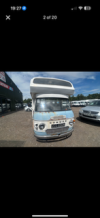
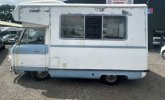
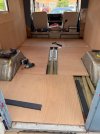
Thought I would give you guys an insight to the project ive got going on with my commer I got in July.
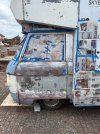
Heres some of the pictures of how I found her.

 

Attachments

  • B28F36AA-B69D-4EDA-90E0-66FB54E6EB04.jpeg
    B28F36AA-B69D-4EDA-90E0-66FB54E6EB04.jpeg
    26.3 KB · Views: 63
  • IMG_6437.png
    IMG_6437.png
    33.9 KB · Views: 54
  • IMG_6440.png
    IMG_6440.png
    36.3 KB · Views: 40
  • IMG_6438.jpeg
    IMG_6438.jpeg
    7.5 KB · Views: 32
  • 7406AB98-4431-4970-A716-72508332AF35.jpeg
    7406AB98-4431-4970-A716-72508332AF35.jpeg
    27.1 KB · Views: 30
  • IMG_6442.png
    IMG_6442.png
    36.4 KB · Views: 28
  • IMG_6441.jpeg
    IMG_6441.jpeg
    24.9 KB · Views: 26
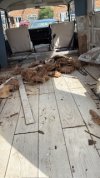
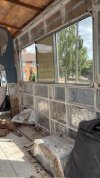
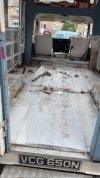
I then spent a good day or so ripping her to shreds! This part was actually very fun despite finding dead mice, birds and god knows what some of the little skeletons in here were! Oh i also pulled a "wire" out the dash which turned out to be a rats tail. with said rat wrinkled up under my mats! But we found a very solid rear floor!
 

Attachments

  • IMG_6536.jpeg
    IMG_6536.jpeg
    76.2 KB · Views: 31
  • 67480670-025D-4BF2-B2D5-CF60D486C162.jpeg
    67480670-025D-4BF2-B2D5-CF60D486C162.jpeg
    27.9 KB · Views: 28
  • 2EB5F953-CDB6-4C41-8F76-EC45026AE453.jpeg
    2EB5F953-CDB6-4C41-8F76-EC45026AE453.jpeg
    28.8 KB · Views: 27
  • 9B8D811A-8347-47D3-A281-FB4071D185D9.jpeg
    9B8D811A-8347-47D3-A281-FB4071D185D9.jpeg
    27 KB · Views: 22
  • IMG_6551.jpeg
    IMG_6551.jpeg
    78.3 KB · Views: 22
  • IMG_6552.jpeg
    IMG_6552.jpeg
    80 KB · Views: 22
  • IMG_6565.jpeg
    IMG_6565.jpeg
    84 KB · Views: 22
  • IMG_6578.jpeg
    IMG_6578.jpeg
    79.2 KB · Views: 30
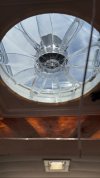
These images are coming out tiny so will try the next size up but dont want to overload the thread so nothing loads, next up was fixing all the roof leaks, had 9 of them. When i got her, the roof literally just had a bag over where the roof vent should be so all the water got in over the years where it had been sat and rotted the wood on both sides of the box, so this all had to be taken off and replaced which i made a start on once I finished the roof leaks. Put a temp bit of roofing flat roof felt over the vent hole whilst I waited for the new fan to be delivered.IMG_6790.jpegIMG_6776.jpegIMG_6828.jpegIMG_6822.jpegIMG_6928.jpegIMG_6932.jpeg
 
Last edited by a moderator:
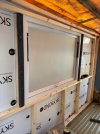
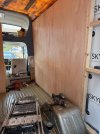
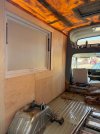
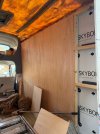
So once I had the new panels on, I opted for thicker than the usual, as I was building a much sturdier frame which I know will add more weight overall but will still be way under in terms of load once its all kitted out. I then fitted the hatch and did the timberwork for the hatch framing, had to add some battens for support and then insulated and plywood both sides and then battened the floor and plywood down.
 

Attachments

  • IMG_6960.jpeg
    IMG_6960.jpeg
    143.8 KB · Views: 24
  • IMG_6978.jpeg
    IMG_6978.jpeg
    151.7 KB · Views: 21
  • IMG_6983.jpeg
    IMG_6983.jpeg
    151.3 KB · Views: 21
  • IMG_6998.jpeg
    IMG_6998.jpeg
    138.8 KB · Views: 23
  • IMG_6985.jpeg
    IMG_6985.jpeg
    146.4 KB · Views: 22
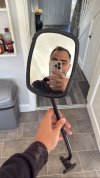
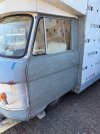
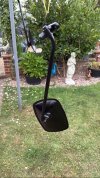
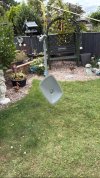
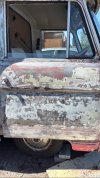
The only things left to do with the rear were now the roof vent fan, and then cladding the sides with hygeine saniclad which I have done but havent done the roof yet as I need to finish that part once I get the ovens in. (much later down the line) also took the mirrors off and gave them some new glass and a quick rust off basic black paint for now. Took the doors as my next task which are full of filler as expected. So will probably get new skins later down the line but for now have just etch primered then used some high build just so they somewhat survive in the shitty weather.
 

Attachments

  • A5850673-894A-47D6-A3E0-22FDD83F30DA.jpeg
    A5850673-894A-47D6-A3E0-22FDD83F30DA.jpeg
    73.4 KB · Views: 26
  • IMG_7114.jpeg
    IMG_7114.jpeg
    151 KB · Views: 23
  • 123535B9-B9D9-42EA-A4C8-F6FE4AE6EF5E.jpeg
    123535B9-B9D9-42EA-A4C8-F6FE4AE6EF5E.jpeg
    66.2 KB · Views: 23
  • 83D68437-AF2C-4D12-B9D3-6A2FF6EBE427.jpeg
    83D68437-AF2C-4D12-B9D3-6A2FF6EBE427.jpeg
    129.3 KB · Views: 24
  • 10D01C08-137E-4834-BC60-7C8C4BF1979E.jpeg
    10D01C08-137E-4834-BC60-7C8C4BF1979E.jpeg
    140.9 KB · Views: 26
  • C4002718-023A-40BD-8AFC-16045670B79B.jpeg
    C4002718-023A-40BD-8AFC-16045670B79B.jpeg
    99.6 KB · Views: 23
  • 5D04F294-C840-47EC-A51A-CDCA8321709A.jpeg
    5D04F294-C840-47EC-A51A-CDCA8321709A.jpeg
    79 KB · Views: 24
  • IMG_7102.jpeg
    IMG_7102.jpeg
    195.5 KB · Views: 29
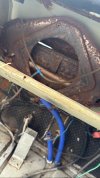
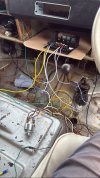
Also on the doors I took the door cards off as I couldnt get out without opening the window before, so door cards came out, bit of WD40 and we were good to go again, they even lock! So was chuffed with that. My next task was getting the engine sorted slightly, so I knew I had an SU carb, so i spent ages on AC Dodds youtube and he basically became my best virtual friend of the youtube world within a few hours, cleaned the carb out, adding some 3 in1 to the dashpot, fired her up, running better but I knew I needed to flush her out. I had already ripped the heater matrix out earlier but forgot to mention that, it was rustier than anything else on the Commer! Which meant I really needed a new front which I managed to source through some of the guys here. I then started the big rewire which is what im currently doing. There is probably more but I will update this again when I get some time, systems been flushed fully so no more rusty water, added coolant and water 50-50 split, running very well now compared to how it was when i got it. Will be giving it a proper full service eventually but sorting the wiring is the next big challenge.
 

Attachments

  • IMG_6635.jpeg
    IMG_6635.jpeg
    185.5 KB · Views: 27
  • C5394AFD-F797-4F7D-8FF8-F59D500D20C8.jpeg
    C5394AFD-F797-4F7D-8FF8-F59D500D20C8.jpeg
    73.3 KB · Views: 25
  • IMG_6690.jpeg
    IMG_6690.jpeg
    218.3 KB · Views: 25
  • a8cbab4f-d77f-40f9-8238-7588920fdec9.jpeg
    a8cbab4f-d77f-40f9-8238-7588920fdec9.jpeg
    88.7 KB · Views: 23
  • 50D09D5E-B787-41B1-9A1A-378F55F12958.jpeg
    50D09D5E-B787-41B1-9A1A-378F55F12958.jpeg
    101.5 KB · Views: 23
  • IMG_6685.jpeg
    IMG_6685.jpeg
    164.1 KB · Views: 24
  • IMG_7021.jpeg
    IMG_7021.jpeg
    201 KB · Views: 27
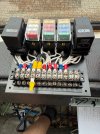
I'm using this wiring module to do the rewire, it has way more than I need but always good to have extra incase I wanted to add extra things later down the line and its much more modern than what was in her originally as you all know.

What I am doing is also writing down how it was all wired up originally, with colours and tracers going to what parts (ie through the a pillar) as wiring diagrams to me are a bit of a mess especially with so many different variants of Commer, especially if they are not wired original in the first place which I think could be the case with mine but my diagrams will be like fully braindead version because thats what works for me so will share all that here once ive finished the job.

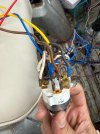
As the heater matrix got taken out I have joined the hoses together in the engine bay so the coolant can get around the system and its not overheating at all and I have managed to rewire, Gauges, Horn, Headlights, Sidelights, Front indicators, Wipers, Jets but the bane of my life atm is the brake lights, they were not working when i got the motor, I got them working on the old wiring briefly then couldnt get them going again so I think my rear cluster connectors must be shoddy where the actual bulbs go so I will probably buy some new rear lights to solve that issue.

Which leaves me with Hazards to wire up, then the radio, once ive solved the rear brake light dilemma.
 

Attachments

  • IMG_6862.jpeg
    IMG_6862.jpeg
    187.4 KB · Views: 34
  • AE57800E-C19E-4A2B-95EF-4E9609F75FD9.jpeg
    AE57800E-C19E-4A2B-95EF-4E9609F75FD9.jpeg
    64.5 KB · Views: 32
  • 2BE41C8B-4977-499A-A4FF-4A7570C11566.jpeg
    2BE41C8B-4977-499A-A4FF-4A7570C11566.jpeg
    64.3 KB · Views: 28
  • IMG_6876.jpeg
    IMG_6876.jpeg
    166 KB · Views: 29
  • D05F4932-A48F-42DE-A74D-AF22A75EB483.jpeg
    D05F4932-A48F-42DE-A74D-AF22A75EB483.jpeg
    102.3 KB · Views: 47
Last edited:
So thats all the spam from me for the evening. I will update you guys again soon ish with how my wiring progress goes. I also might get the dashboard 3d printed. I might also get the gauge shroud 3d printed and the Commer letters as mine are in quite good condition so using them as moulds might be useful for people in the future. Will let you guys know if I get all that done.

Also if any of you want to know what colour wires do what, hopefully soon I will have that all listed for you as I've got most of it mapped out now.

Have a good weekend!!
 
A short and sweet wiring update for you all. I HATE CAR WIRING.

Jokes aside its been a breeze until these rear lights, I'm pretty sure its a grounding issue so ive got a bus bar coming tomorrow which i will mount somewhere on the rear of her as my rear bumper is fibreglass and the lights cant ground to the chassis very well off that so running a bus bar and then grounding with rings from the screws which bolt the clusters together im hoping will solve my issues, spent like 3 hours on it today only to go from working side lights, to when i press the brakes one goes off to getting working brake lights and one side light going off, then when i presseed the brakes the indicators started going as it clearly had nothing to ground to properly to complete the circuit. Oh and my indicators dont flash at all if i hook up the rears but the fronts do when they are connected so something is clearly dodgy with the rear wiring in poor old Betty.

Back on it tomorrow hopefully with more success!
 
Worse case can you run a negative wire from the battery to the bus bar?
This is exactly what I ended up doing, I still need to route the wire properly but everything is now working wiring wise apart from my washer jets but I’ve got new tubes on order then will get that sorted. Mission complete really, next task is to build some sort of platform within the dash for my fuse box to live safely with easy access. Still haven’t sorted the hazards yet as I blew the flasher but will get around to sorting that later down the line once I come to tidy the looms. Next mission is to paint the engine cover and under the seats and floor
 
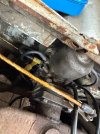
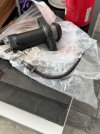
I’ve aborted the paint mission short term for now, noticed I had a leak from the clutch cylinder slave I think, so ordered a new one got the old one out just now so will fit the new one to tomorrow. Do I leave that black rubber on the right on or does that come off for the new install?
 

Attachments

  • IMG_7248.jpeg
    IMG_7248.jpeg
    175.5 KB · Views: 32
  • IMG_7263.jpeg
    IMG_7263.jpeg
    145.1 KB · Views: 35
  • IMG_7262.jpeg
    IMG_7262.jpeg
    102 KB · Views: 37
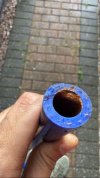
There's usually a red tinted plastic pipe from the master to the slave and that tail pushed into it - as in the first pic.
 
There's usually a red tinted plastic pipe from the master to the slave and that tail pushed into it - as in the first pic.
Yeah that’s what I took this bit off from, unsure if I was supposed to I’m assuming once I’ve put the new one in I can just put the pipe onto the new one.

The rubber big bit on the other side of the cylinder is still attached to the metal thing that goes through it. If that makes any sense at all, I was unsure if I need to remove that, as it looks as if it’s the old seal from the one I’ve taken off
 
I'm thinking you mean the dust seal on the cylinder, if so there will be a new one on the replacement cylinder.
 
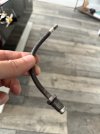
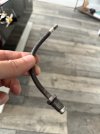
Update, Fitted the new slave today, was hard to get the red tubing on but got it on in the end and its still pissing fluid out from somewhere, worked for a bit then after about 15 mins the fluid was gone. Thinking maybe an issue with the master but unsure it could just be my line is bad somewhere, can i just buy a universal line for this and it will work or are there actual commer ones out there?
 
I guess any would fit that’s long enough and has the correct fittings. Assuming they’d be a unf thread both ends. Think I have an old slave cylinder and a box of bsf bolts. I’ll try and measure it for you
 
Last edited:
I guess any would fit that’s long enough and has the correct fittings. Assuming they’d be a BSF thread both ends. Think I have an old slave cylinder and a box of bsf bolts. I’ll try and measure it for you
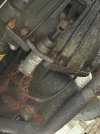
Diamond would appreciate that, I think the only way to solve the issue is a new line, I went under her again today and no leaks from the master it’s all leaking at the end of the line where it goes into the metal thing see attatched. I think it’s just that my hard red tubing is shafted and it’s supposed to be put on with a special tool and this just slides on but not tight enough clearly.
 

Attachments

  • IMG_7262.jpeg
    IMG_7262.jpeg
    102 KB · Views: 31
Back
Top