The Green Bean 2

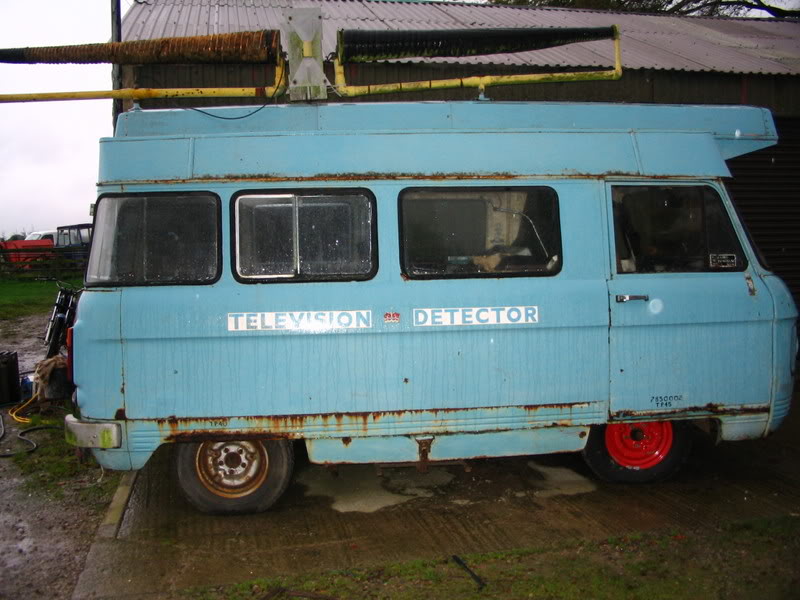
Just bought the Autosleeper van off Ebay.
Went to see it a few days ago.
It is generally very solid and needs no welding for an MOT.
I shall blather the underside and box sections with wax and protect the areas that are starting to rust elsewhere on the body.
It needs a general overhaul on the engine, brakes suspension for an MOT.
The fridge and cooker will want checking out and the interior cleaning up.
Then the plan is to use it this year.... YIPPEE.
The Green Bean 1 is still continuing though
I shall add some pictures soon.
 
I got the new van back safely.
Its previous owner was Sue another member here.
I will keep updating the information so Sue can see how the van is getting on.
There were no real suprises after looking over the van. A little more rust than I thought under the front bumper but nothing to worry about this year. I will just soak the whole area in thinned wax to protect it while I use the van this year.
Looking over the van I realised that this earlier version does not have a fridge installed, I just assumed it did as my later one does.
the roof is also conciderably smaller in width than my later one.
The wider roof on my later one gives an appearance of a lot larger interior but the small roof has held its shape while the bigger one has sagged a bit.
I will be purcasing a couple of railway sleepers tommorow to saw up and level the van and also to lift it higher to make working undernieth easy. I will get some pictures posted soon. Unfortunately it seems to be permanently dark at the moment.
Rob
 
Hi all,
Had a bit of a fiddle with the Green Bean 2 this weekend.
I replaced the fuel tank as the old one had some sort of sticky goo in the bottom and a thick layer of white powder above the 'waterline'

The 'new' tank came from my white van. The 1969 tank is diffeent to the 1972 tank on the filling tube fitting.

I had to take the filling tube as well as the tank so also took the locking filler cap to prevent the local idiots placing anything in there.

It did not need to but got carried away and rebuilt the clutch slave cylinder which was in realy good condition under the thick layer of engine grime. I then made up a new aeroquip hose to replace the plasic tube that had split.

It now works perfectly but showed up the next thing to tackle... The clutch plate is well and truly stuck to the flywheel.

The rear door hinges were seized fairly solid so I removed them and drowned them in WD40 and gave them a bit of heat and after a lot of wiggling in the vice they eventually freed off.

The hinges are aluminium which supprized me a bit.
This is probably why they seize up very easily.

Rob
 
Yippee...got the clutch unstuck in 10 minutes of madness.
I did not want to have to remove the gearbox to free the clutch.
The van is also parked on an area of very loose hardcore (half bricks etc) which makes it virtually imposible to work on undernieth.

I got the clutch unstuck by jacking the rear axle up so the wheels cleared the ground then stood it on blocks of wood. The back of the van is just off the hardcore and is over the concrete base of an old heating oil tank so that area is level and stable at least.
Then fired up the van in 4th gear with the clutch depressed, the rear wheels spinning away undernieth.
After a short while of blipping the throttle on and off the whiring and vibration, all of a sudden, quietened down and the speedo dropped down to zero.
I am now in with a chance of getting it MOT'd as I can now drive it off the hardcore to where I can work on it properly.

I must admit to having a childish 'pretend to drive' with the rear wheels up. Up the gears a few times and back down. Tried the horn..."sspphhhffutt..sspphhffutt" so that needs looking at.

Rob
 
Hi,

Back from the dead..
I have completely forgotten my password so after 9 million variations I gave up and re-registered as Greenbean.

The Greenbean 2 is now up for sale :( on Ebay Item number: 120232476010

Unfortunately where I have been storing my vans is in a friends workshop. He has been working on his race car in the workshop at work. He has been asked to remove his car from the works workshop so he has asked me to make space in his workshop. So the chain continues and I just do not have the space for three of them.

Greenbean 1 is still continuing though :)

Rob

Greanbean = Rob Smith after forgetting his password...doh
 
I was just showing that ad to my mate and it disappeared. Has it been taken down or did you remove it?

If it's still for sale could I get your contact details?

"You were only supposed to blow the bloody tyres up!"
 
Yes,
I am the most useless man on earth when it comes to usernames and passwords.:I
I like Greenbean. I have a chance of remembering it.

Rob


Greanbean = Rob Smith after forgetting his password...doh
 
And I thought I was THE most useless at remembering usernames and passwords, thats why i use the model name of my motorbike!!

back to my "rootes"
 
Like what you are doing.

Saw a Commer in retro car mag about 6 years ago that had a volvo motor - was that you? liked the yellow headlights.

There is a good article on tuning the 740-960 range of volvos in this months practical performance mag.

Turbos - hmmm
 
Hi Rob.. Its good to have you back, and with some new conversion
ideas too.:) Cant wait to see it.
Good luck mate..;)
 
The collecting of bits is well underway:

This is a 'cut and paste' from my parts list of wanted items.

B230 1993 block with oil squirters for piston cooling. (Got)
"531" head (Got) rebuilt with new valve guides and new sodium filled valves
Compression ratio somewhere around 8.2-8.5:1.

Mitsubishi TD04HL-15G flat flange turbo keeping the standard intake bypass valve fitted. (Got)
Manual Boost Control set to 14 PSI boost pressure
Fit a quiet dump valve to ditch the sudden pressure increase before the turbo inlet bypass valve opens.
Custom exhaust through large free flowing cat and large free flowing silencer.
1990+ ported manifold (got)

NGK BP7ES plugs (Got)
Side distributor (Got)
M90L2 gearbox (Got..rare as rocking horse doo-dah)
'A' Cam (got)
Lightened Dog-dish flywheel with LH2.4 drillings. (Got..not lightened yet)

Bosch Jetronic LH2.4
0280 000 984 Fuel ECU with Freds chip (Got ECU need to get Freds chip_
0227 400 207 Ignition EZK with Freds chip(Got EZK need to get Freds chip_

Instal a Switch on EZK pins 18 & 19 (to GND)
* By grounding pin 18 you will get -3° (retard).
* By grounding pin 19 you will get -6° (retard).
* By grounding pin 18 and 19 you will get +3° (advance).

Bosch 0 280 213 012 3" Air Mass Meter
E5ZE-A3B injectors (Got)

StdFuel pressure (Have not got this yet)

Clutch combination (as listed on Freds listing)
Standard 940TDi clutch setup. Good for up to 400NM.
Clutch disc 940TDi, organic, 20 splines, 228mm, Sachs p/n: 1862 468 031
Pressure plate, stock, 228mm, Sachs p/n: 3082 204 033

98 octane fuel.
5W-40 Mobil 1 oil

Nissan Cabstar Chassis (Got)
Nissan H233B axle (Got)

Oh... Commer Autosleeper van (Got)

All new panels to fix the rusty bits (Got :) and not selling!!)
I have been gathering these for a while.

Rob


Greanbean = Rob Smith after forgetting his password...doh
 
Back
Top