HERE WE GO..!!! 1977 Pick up

So progress is moving ordered my new tank from TIM. looking forward to fitting shine new parts..

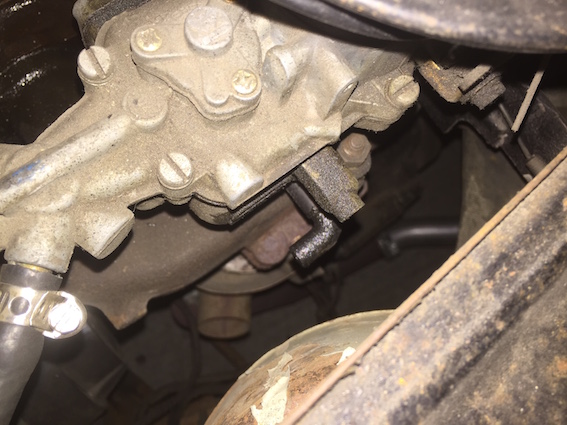
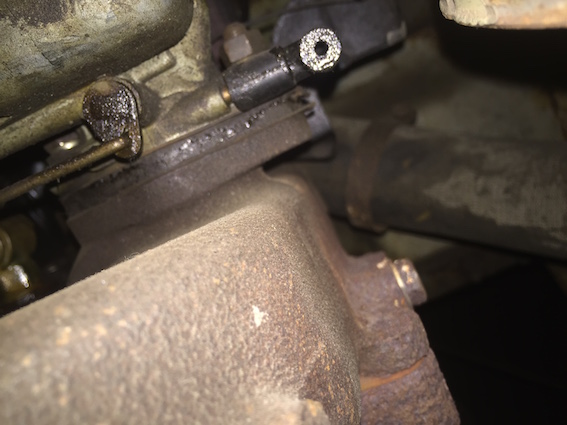
been poking around the engine bay today and found this open pipe right angle thing on the carb. any ideas what it is and do i need to do anything with it?


2015215163230_Open Bit on Carb Top.jpg

2015215163442_Open Bit on Carb.jpg
 
That's the vacuum advance connection, there should be a thin pipe going from there to the vac unit on the dizzy. Have a look at the dizzy end to see if it's still there, if not a Mini (proper) one will do the job.

41fa30c8-22ce-43e8-bd12-188475a80292.jpg
 
The engine wont run right without it as you are drawing air in so running lean, and the dizzy wont be working as it should:I

41fa30c8-22ce-43e8-bd12-188475a80292.jpg
 
Nice one Panky, I'll get my ass in the garage tomorrow to check that out...

one last picture from this weekends activities....

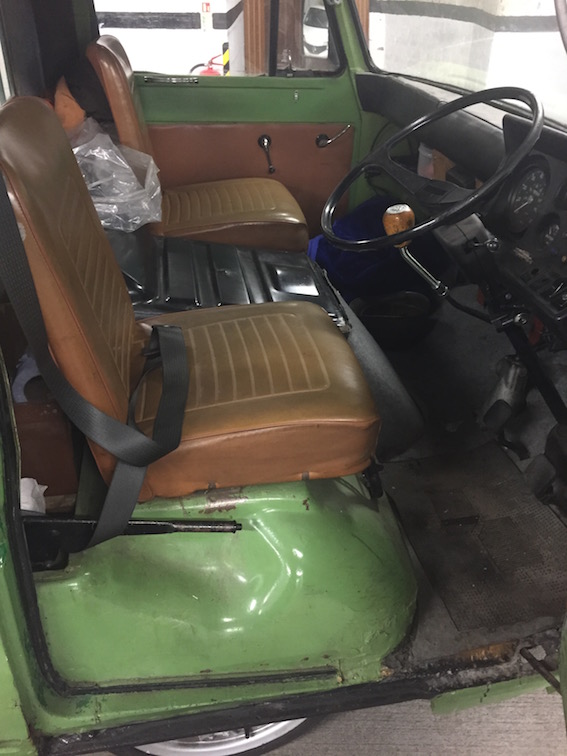
My Interior.. IS REALLY NOISY... no real carpet or soundproofing anywhere...

has anyone soundproofed their cab whats recommended. stuff I'm finding seems expensive for how much it covers?
201521519152_Interior.jpg
 
I would imagine a little bit of brackety will be required but the water hoses simply attach to the two connections you can see on the side. The switch should be easy enough, just make sure the fan is spinning the tight way. You will obviously need to take the old one out and blank off the vent first.

41fa30c8-22ce-43e8-bd12-188475a80292.jpg
 
& scroll
http://forum.commervanfan.co.uk/topic.asp?TOPIC_ID=4989&whichpage=12&SearchTerms=inconel.
should have taken more pics!

Commer Dandy by Dandy Caravans now Riva Dandy
The Colonel Mustard six speed
9858609586_be59f5d209_t.jpg

Member of the 6 speed club.
 
Look what i just got..!!! Cannot wait to get my ass back in the garage...

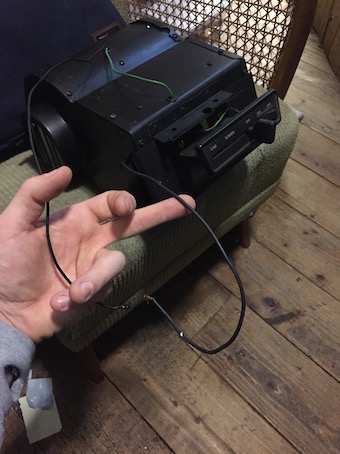
Just some advice on the wiring one is an earth black wire from the side of the unit. Is the other black coming from inside also an earth?
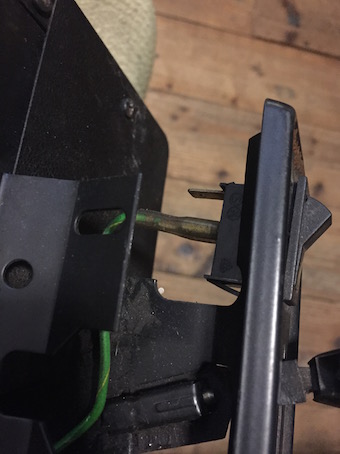
then on the back of the switch it needs i assume a power? wheres best to take this feed from?

2015219101910_New Heater Wiring.JPG
2015219101922_New Heater Switch.JPG
 
I cant remember off hand but I suspect both are earth connections. Best place to take the power feed from is the original Commer switch:)

41fa30c8-22ce-43e8-bd12-188475a80292.jpg
 
The one on my index finger is connected to the other casing the one in my palm comes from inside the heater...

power from the original comer switch.????
 
I think it's safe to say the one connected to the casing is an earth and the other black one cant really be anything else either. Disconnect the live wire to the original Commer heater fan switch and connect it to the terminal on the Mini heater switch - job done:)
Or you could always leave the original fan switch connected up and disconnect the wire off the original heater and connect it to the green wire on the mini heater, that way you can operate the fan from the dash as before.

41fa30c8-22ce-43e8-bd12-188475a80292.jpg
 
So Slowly getting together all the parts to overhaul the pick up. New Heater arrived, New tank on order, Soundproof mat and underfelt, sheet of stainless of covering up the upper grill.

Having read a few peoples build threads it seems that comers aren't to opposed to a small fire every now and then? WIRING is super basic.

This is on my list of Job once i have her in the workshop and start the strip down. I have in the passed rewired my Karmann ghia from scratch using old wiring diagrams so confident in my abilities to take on the full rewire myself. :p

How ever does anyone have an advice / ideas or suppliers they recommend? also does anyone have a good quality image of th original wiring that i can use as reference?

All and any help will be gratefully received.

also i have order a new stainless tank for a member on here (comeracer Tim) does anyone know what size the fuel lines need to be inout from filler neck and fuel line to fuel pump ?

cheers Ryan
 
Don't know for sure but new filler elbows are available from the usual outlets and you will only need a short length of fuel line to connect the new tank to the original pipe to the pump. You will probably need a new length for the breather which is 1/2" if I remember correctly:)

41fa30c8-22ce-43e8-bd12-188475a80292.jpg
 
i have a new breather pipe already. are all filler pipes the same diameter? i was hoping to replace the whole fuel line with new stuff and run it around the front through the rad somewhere (i read somewhere about rewriting the fuel line to stop fuel evaporation? (can't remember the finer details without searching again)

do i need to change anything on the fuel pump to renew the whole line? as it looks to be a screw fitting of some form???
 
When I replaced my filler pipe elbow I got one from Martin, wasn't for a Spacevan but the pre face lift...i think they are slightly different size pipes but got it to fit eventually after putting in boiling water and stretching it over a bottle for a couple of hours...did my knuckles though #128522;

The Blue Toaster
commercrop_zps68ea08d6.jpg
 
The line going into the pump is usually plastic with a screwed fitting at the pump, you can just cut it back leaving enough on to slide the new pipe over it and secure with a hose clip. I'm pretty sure the line from the tank to the pump is all plastic so if its OK I'd leave it alone - you only need to re-route the pipe from the pump to the carb in front of the rad to help with fuel vaporisation.

41fa30c8-22ce-43e8-bd12-188475a80292.jpg
 
About the electrics. I've just rewired a fair proportion of mine, and learned a lot as a result. You're right Ryan, original wiring is super basic. Trouble is, a good proportion of it is unfused, meaning that a short circuit can set fire to the wiring very quickly.:(

In particular all the lighting final circuits are unfused, plus the heavy wiring for the light switch, the heavy wiring for the ignition switch and on to the fusebox, and the heavy wiring to the fusebox for the non-ignition circuits. Whilst shorts are relatively rare in the fat wiring, they do happen, as you can see from my "jennings restoration" thread.

There's also quite a bit associated with the original alternator control box, relay, and warning light unit that can be removed to simplify things if you have had a later alternator fitted. (Most have by now)

If you want, I can go into more detail, but it's difficult to describe the solutions, and I wouldn't want to complicate things.

A few of my favourite general tips..........Crimp AND solder all the connections. I've just had to solder about 100 crimped connections on my old Volvo 850, because corrosion had crept into the computer wiring. Use bare metal connectors with separate shrouds. Crimp the conductor first to make a good mechanical joint, then solder for long life. Then crimp the insulation grip, and slide a shroud over every one. Wrap the whole harness in proper harness tape (that's PVC tape without any adhesive) ordinary electricians tape goes all slimey and slippery when it gets oily or hot, and if you forget a wire, you can unwrap and rewrap easily. Keep the old harness together with cable ties because if it all falls apart, it's very difficult to put back together.

Hope this helps:)


Commer PB Jennings
 
Back
Top