flute seam repair

after last weekend's sucessful trip, I decided to pick at some rusty bits (as you do...)

IMG_2278.jpg

IMG_2277.jpg

IMG_2282.jpg


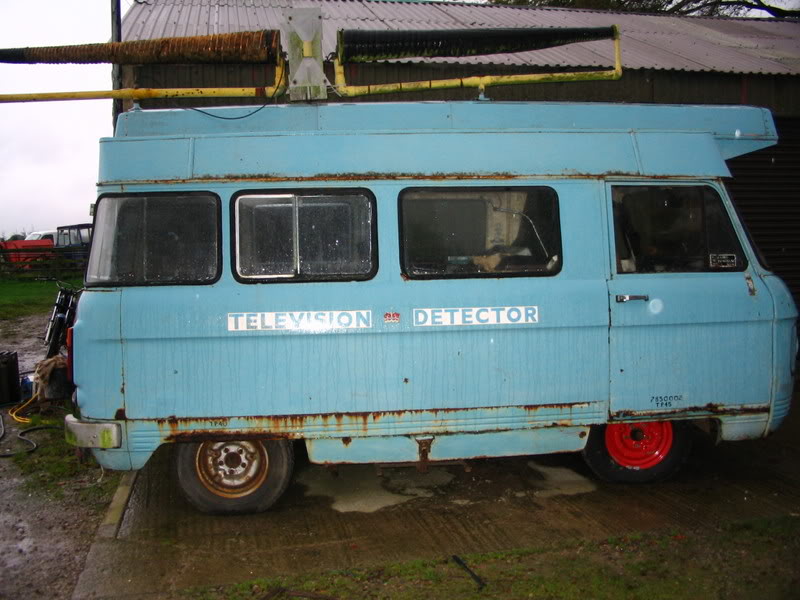
so the question is this... what is the neatest way to fix this. The fluted panels have been replaced at some time and are mostly fine. the damage is to the bottom of the main side panel. the interior is still in so I can't do too much from the inside and most of the damage is behind the wheel arch so getting a welder in is impossible anyway.

Woolfie, Martin - what do you think?

thanks

Rupert


"Atheism is a non-prophet organisation"

www.littleyellowcar.co.uk
 
You really need to get to the inside [B)] You can chop the bottom off the side panel and weld in a new section, but it needs to be welded on top of the cill/floor junction. It is possible to tack weld it along the seam, but it won't be as strong [V]

http://www.commervanspares.co.uk/

http://www.yorkshireclassiccampers.co.uk/
 
quote:
Originally posted by martin maltas

You really need to get to the inside [B)] You can chop the bottom off the side panel and weld in a new section, but it needs to be welded on top of the cill/floor junction. It is possible to tack weld it along the seam, but it won't be as strong [V]


fair enough I suppose - I'll see how I get on once the tank is out.

How do you weld the outer skin part behind the wheel arch though - there seems to be about 30mm space (if that) I'm sure I can't get a welding torch in there....

so how do you take the interior out of an Autosleeper ? [:0]

Rupert


"Atheism is a non-prophet organisation"

www.littleyellowcar.co.uk
 
gentle persuation rupert its all screwed down to the floor etc I removed the seats that make the bed from no.1 & put them in Sybhil I had to use screw drivers to wiggle under to get some out they were that rusty!

Sybhil
4440738170_a18ab2bd4e_o.jpg
 
Work your way forward from the wardrobe which is attached to the sink unit with a few nails and screwed down to the floor. The cupboards are screwed to the floor along the bottom front rail and into a batten running under the window line. The only screws I couldn't shift were the ones holding the seat boxes down - so I drove a wide chisel in between frame and floor and slipped a hacksaw blade in to cut through the screws.

th_killin.jpg
 
or if you dont want to take the units out you will have to do it like martin suggested, which is to chop off the bottom inch or so of the main panel neatly, but only were required, do not cut all the way along of you will be in big trouble as the whole main panell will go all floppy and you will never get it to line back up properly no matter how good one may be at welding. once you have cut out a section of say six inchs or so for example you will then need to make a repair peice the same size as the hole in length but say ten mil bigger in height and with an inch return at the bottom where the seam meets. then you are probably better to joggle the main panel along the bottom of the metal using a joggling device, this will enable you to sit the new peice of metal onto it but still resulting in it finishing flush when welding is complete.when welding the new peice of repair metal to the lower fluted cill you will have to stich weld the two together from the out side along the seam. what ever you do though before embarking on this method please make sure someone is there with you looking inside the van at all times incase a fire breaks out whilst your outside welding and have some water at the ready. also make sure that you dont have anything inside the cupboards like gas cylinders. this isnt the best way to do the job by all means but if you dont want the hassel of taking all the units out then its gonna be your only route i think. unless someone else has any other ideas. again though please be (very very) carefull as the fire can spread very fast if your not vigilant and watching what your doing.;):p

th_HPIM1509.jpg

Big Bad Woolf
 
And also remember that quilted lining on the inside of the panels - it is VERY flammable and gives off nasty fumes[xx(]

th_killin.jpg
 
thanks for all the info guys - Woolfie, I started to take out the cupboards then realised that I could do all I needed to with them still there. Also there is no way to get to the inside of the seam where the inner arch is (even with hte cupboards out) so I went for the "budget" option of doing some from outside and some from inside. Don't worry I have been careful about fire. Panky, I remember your demo with the insulaton and that kinda scared me a bit! I finished welding half an hour ago (as it was raining) but I've been popping out to check for smouldering!

IMG_2293.jpg

IMG_2291.jpg

IMG_2298.jpg

IMG_2297.jpg


its not pretty and I have lots to finish off, but I'm quite pleased so far. I have found the bottom of the corner panel (right hand side of the second piccie) needs some work so plenty more to do!

Oh and I'm gonig to have to work out how to make flutes for hte bottom of the bit (two flutes are required!).

thanks again for the help

Rupert

"Atheism is a non-prophet organisation"

www.littleyellowcar.co.uk
 
I made a similar sized repair section (but just one flute) I found the piece of bar that I used as a dummy shaft for the gearbox strip down was an ideal former. All I needed then was a vice and a big hammer:I Trying to do two flutes using this method would be tricky, best to do it in two halves and weld them together.

th_killin.jpg
 
thanks for the top tip - I've got a growing pile of smashed up steel samples which look nothing like flutes!

If its good enought for Harvey then its good enough for Jessica. I can see Jess needing to pull her socks up if she's not coming home with the shed award again!

Rupert

"Atheism is a non-prophet organisation"

www.littleyellowcar.co.uk
 
i see you managed to find a jogglar tool then, excellent work there mate, looks good, but if it was me i would make the stitch welds on the outside a wee bit longer mate about half an inch each in lenght as little spots like that may not hold .the reason being is that your gonna have to gently run or pass your grinder over hem to try and sink them in a bit so that they dont stick out and you retain the seam line look. that way when you run your new tiger seal sealant into the open seam to fill it up you wont have horrible bumpy bits to go over. it will look a treat.;):p

th_HPIM1509.jpg

Big Bad Woolf
 
cheers woolfie, I was planning on doing some more welding (when I get the time and the rain stops!) I just tacked it on to make sure everyting is in line.
I only get about 1 1/2 hours a night - 4 times a week to work on cars so I have to get as much done in one go as I can! Also if its raining next time I'm out I can do the inside welding and tidying up.

How I would love a decent garage / workshop like you've got.

Rupert

"Atheism is a non-prophet organisation"

www.littleyellowcar.co.uk

 
Back
Top