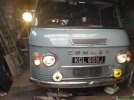
Back of the garage

I bought one of Martin's tubular manifolds off Trevor (Daytona) last year and have finally got round to fitting it to Bonnie.

I needed to fit a stub to take the servo vacuum take off and just happened to have the right size fitting to silver solder in place

KQVJEmK.jpg


hUnZ47z.jpg


The two inlet manifold middle nuts are a swine to tighten up and I could only get an open end spanner end on to pull them up so I've sent for some cap head bolts to replace the studs. The fuel line and cable from the solenoid the starter needed a bit of repositioning but well out of the way now.
Started right up and ran smoothly but will need to wait for a test run.
 
Maybe a little but she already had an SU conversion with the modified standard manifolds (exhaust one was cracked and leaking). She should be a tad more efficient so a bit more economical. Hopefully.
 
After fitting brake servos to both Bonnie and Ted the traveller I decided, after a recent trip, that Harvey needed one too.
With the underfloor battery box I was pressed for space to fit the servo.

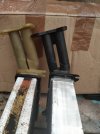
A bit of bracketry required

AyOMwrL.jpg


0lBJYZ9.jpg


A bit of armour plating was fashioned out of 2mm plate, that along with the substantial spars inside and out of the battery box should be enough to protect it. The servo sits a bit higher than the box and the valance so should be in a safe(ish) position.

Kq5mtjE.jpg
 
Love job that Panky! Does it works well? I used to have one but the pipe connector into the servo popped off and got dragged down the road and damaged it. Couldn’t find a replacement so it’s just idle now
 
Somewhere in the deep dark past Harvey was fitted with new rear lower quarters - from a Dodge

rasYmk7.jpg


Perfect spot for some reversing light but the stud on the back of the LED ones I has were a bit short to go through the inner panel. So I did a bit of lengthening

qHPWr0a.jpg


I notched the stud and did the same on a matching length of stud

3EyxvGm.jpg


0o7hPer.jpg


Joined together by running a nut over the join and locked in place with another nut

uAIQafx.jpg


A new switch off Ebay screwed in place of the blanking plug. The wires have been tidied up since.

J0pr8SO.jpg


And behold we have reversing lights and the Dodge bumper bracket holes have gone, pity they didn't hide the crappy bits of filling :)

63Ak8Qh.jpg


0osyfC4.jpg


I think one of the LED circuits got fried on one of the lights when I was cutting the stud - it got a bit hot:rolleyes:
 
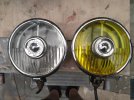
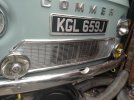
Barb got me these beauties for our anniversary :)

IMG20260619143442.jpg

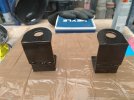
I made a couple of brackets

IMG20260619143556.jpg

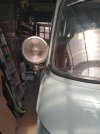
And fitted

IMG20260619145405.jpg

I was attacked by a giant anaconda in the process;)

They still need wiring up and I still have another addition to the front end but still contemplating that one so watch his space
 
I've had this for ages and have been deliberating wether to drill and fit, I decided to go ahead.

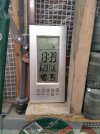
It was a bit warm in there :eek:

Temperature.jpg

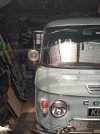
I'm a spot light bitch:cool:

Spotty2.jpg

Spotty.jpg
 
Not Commer progress but the BX GT this time as I found the reason for the soggy drivers footwell carpet.
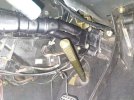
I didn't really fancy laying on my back in the front footwell of the GT during some of the hottest days of the year but a dribble of coolant coming out of the centre console heater vent suggested a leaky heater matrix. I managed to find a NOS Valeo matrix on eBay and ordered seals from Chevronics so no excuses to delay any longer. The lower dash trim needed to be removed, three self tappers and a bolt, to gain access to what lay beneath and subsequently I found the steering column joint needed to be removed the get the matrix out along with a bit of metalwork bending out of the way. There are four long very thin bolts holding the matrix to the heater valve three of which are pretty easy to reach (it it wasn't for the fact I'm bigger than the foot well so twisted at an awkward angle) but the fourth is an absolute pig. Once I'd found and removed a couple of self tappers holding the matrix in the housing I gave it a tug, and another, then...........

I guess I found the reason for the leak
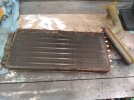
Heater.jpg

I offered new to old and all looked OK

[Heater 4.jpg

But when it was time to fit the new I ran into a problem, the matrix pipes just wouldn't line up with the heater valve (1/2" difference in height) and nothing fitted to the car had moved it was all solidly mounted. So a but of brute force and ignorance followed and the two faces where prised over each other with a greased scraper blade and the matrix was eventually pushed home and bolted up, yay. Time to test it so refilled with coolant and checked the joint - it was pi$$ing out, I must have dislodged the two 'O' ring type seals when forcing the two faces together :?
Day three:-
After a day off to let by bruised and battered back recover a little I set about the job with the vaguest of plans. First make thing a bit more comfortable with a caravan step and a piece of ply to raise my back off the door step. Then I shaved a couple of mm off the fins of the matrix to give a little wiggle room and set to fitting it. This time, with new seals fitted, the difference in height between the two faces was only and 1/4" so the greased blade method was again used to slide them over each other and the scraper easily came free. All bolted up again ( I hate that hidden bolt) and filled with coolant and ............ no leaks :D I ran the car up to temperature for twenty minutes and all was still dry so I'll call that fixed just in time for the heat wave:rolleyes:

Heater valve 2.jpg

Other BX owners has had less trouble with the same job, they must be thinner and younger, but It's not something I'd be doing again soon, hopefully. Just need to get all the oily Evans waterless coolant off the carpet and driveway now :cry:
That was fun:oops:
 
Back
Top